Amazon Simple Queue Service (SQS) is a fully managed message queueing service that allows you to decouple your applications. It helps you improve your applications’ performance and user experience by allowing you to communicate asynchronously between client and server.
So, in this article, I will discuss how AWS SQS changes the traditional request handling process and guide you through the steps to create a simple queue.
Why We Need a Service like SQS?
If we consider a normal request handling process of a web application, we can divide it into 3 parts.
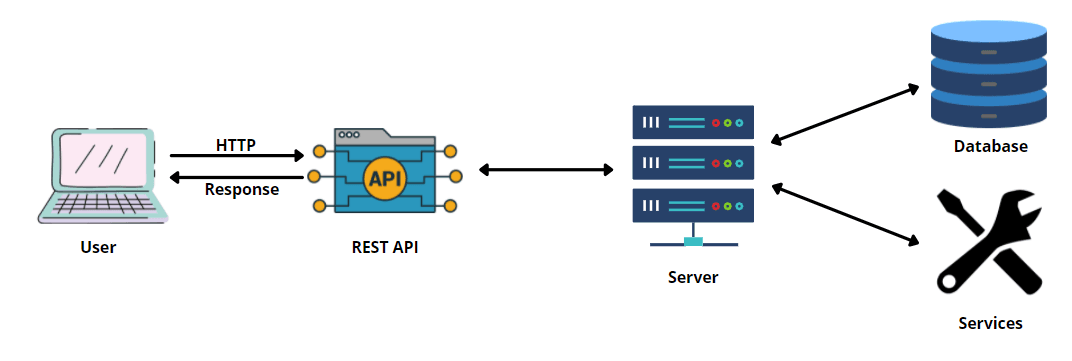
First, there is a connection between the user and REST APIs, and all the requests users make through the browser will be sent to REST Apis through HTTP requests. Then REST API will communicate this request to the server, and it will fulfill the request. Finally, the server will return the response to REST API, and it will give the desired response to the user.
This whole process is synchronous, and your application will have to keep waiting until the response is received.
There won’t be any issues if these requests are small and all the databases and services work fine. However, there is a high chance that users will have to wait for long durations due to reasons like:
- Heavy workload requests.
- Database or service malfunctions.
- Higher request rates.
- High server usage.
With AWS SQS, you can easily make this flow asynchronous and allow users to do other work while your request is processed.
How AWS SQS Solves this Issue?
The main reason behind this issue is the tight coupling between REST API, server, and the services.
With AWS SQS, we can decouple this process by introducing a queue in between REST API and database (or any other service you use).
So, let’s take the same example and see what are the changes we need to make. Since we are using SQS here, I will use API Gateway and Lambda functions instead of REST APIs and servers in this example.
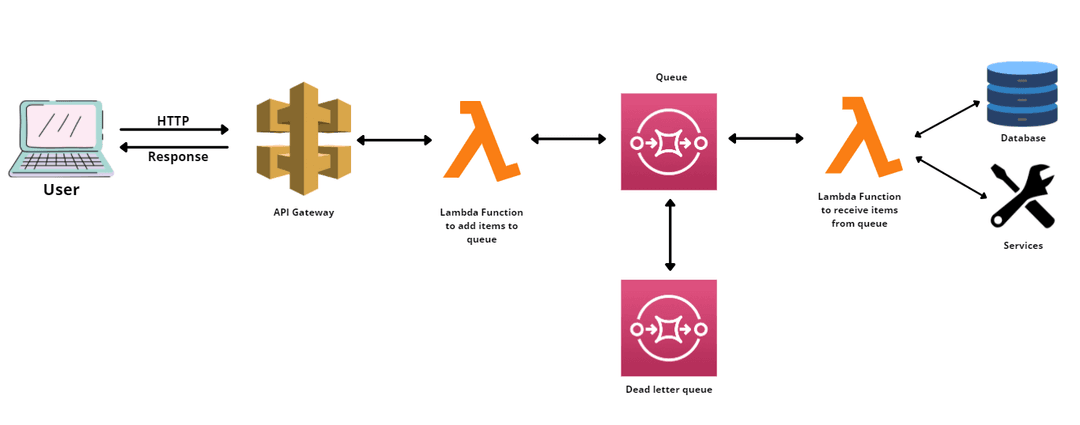
As you can see in the diagram, I have introduced 2 lambda functions and a queue between API Gateway and databases. The first lambda function will act as the function which adds requests from API Gateway to the queue, and the second one will receive requests from the queue and distribute them to the corresponding service or database.
When the first lambda function receives the request, it will respond to the API gateway, stating that it has been successfully submitted. Then API Gateway will inform the browser, and users will be able to continue their work without waiting for the response.
Also, there are 2 queues. The first one is the queue where requests are stacked and poped. The second queue is known as the Dead Letter Queue, and it will be responsible for holding faults requests until they are handled. Dead Letter Queue makes sure that no faults requests are passed to services.
Implementing a Simple Queue Using SQS
Since now you understand how SQS works, let’s see how we can create a simple queue using AWS SQS.
To get started, AWS SQS service using AWS dashboard. There you will see a button named Create queue, and it will start the wizard for you.
First, you will be asked to select queue type and a name for your queue. You can either select a Standard queue where message order is not preserved or a FIFO queue where first in first served.
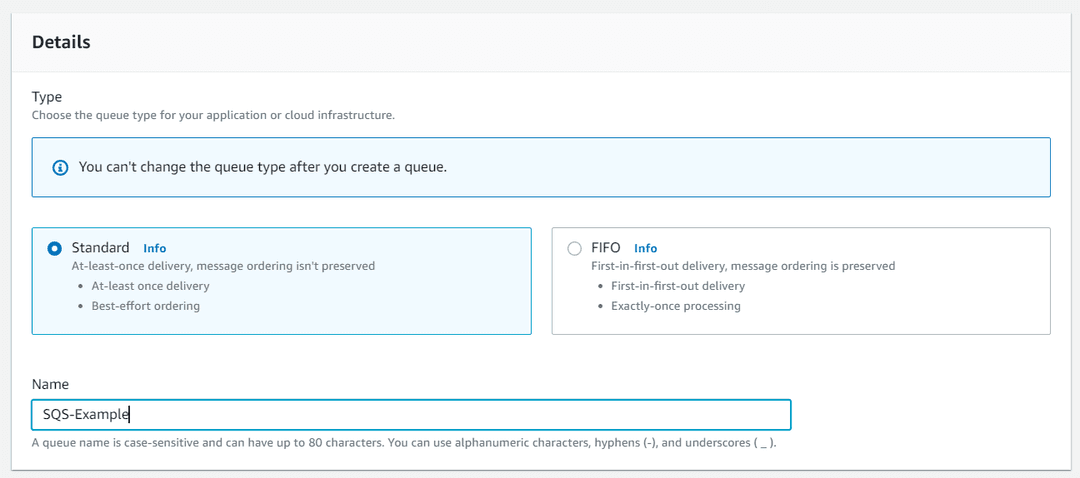
Next, you need to configure timeout time, delays, and message sizes.
As I explained earlier, requests that are queued in SQS will be consumed by lambda functions. So, when a Lambda function starts to serve a request, that request will not be visible to any other Lambda function for a certain amount of time, and that time is defined as Visibility Timeout.
Note: You need to make sure that visibility time is always greater than Lambda timeout duration.
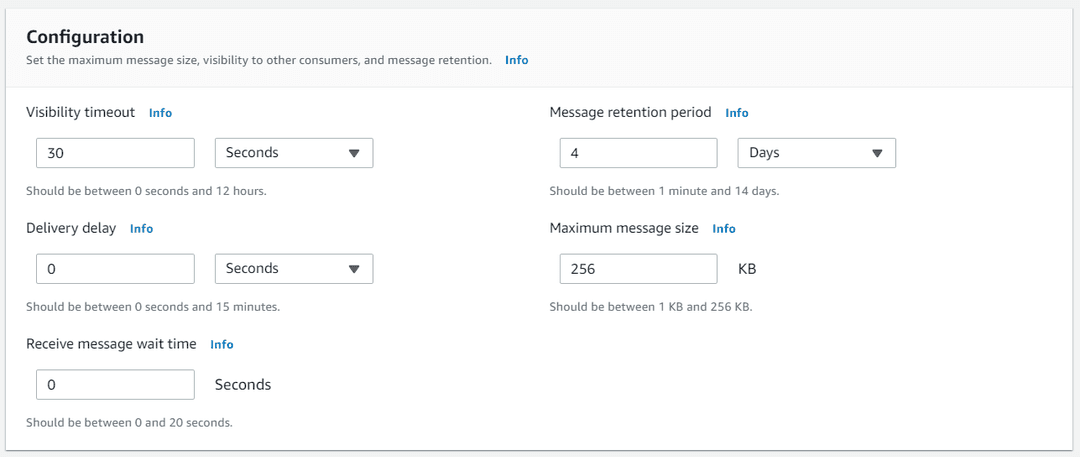
The Delivery delay is the time between requests when they are added to the queue, and you can use Receive message wait time to define how long a message should be in the queue before serving. The Message retention period defines how long you need to keep those messages in the queue if they are not served.
Then, you can change the access policies, encryptions and enable Dead Letter Queue as you prefer.
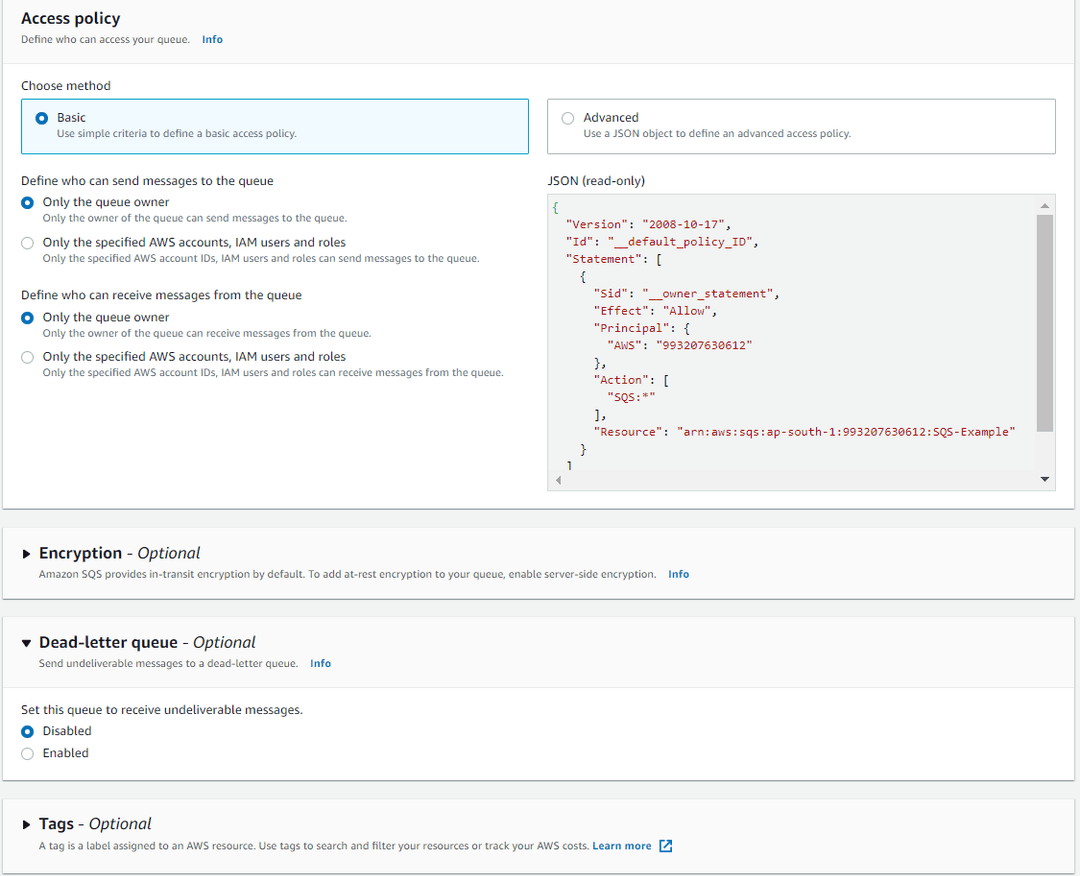
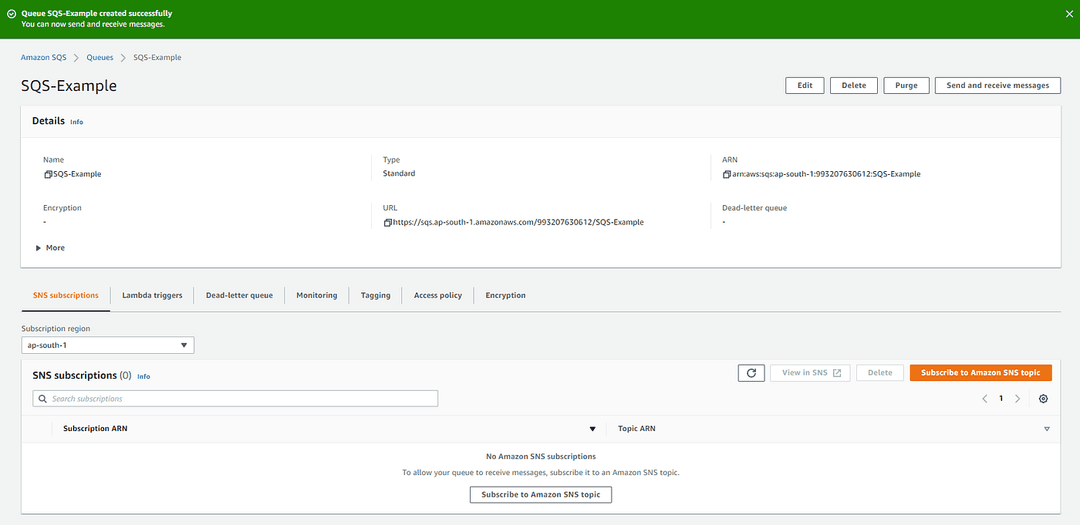
If all seems fine, you can complete the wizard, and it will take few seconds to create the queue.
Conclusion
In this article, I have explained how we can use AWS SQS to handle asynchronous request handling in our applications.
This approach is really useful when requests take too much time to serve or when there are issues in the database or services. Also, it increases the user experience of the application since there are no long waits.
So, I invite you to try AWS SQS and share your thoughts in the comments section.
Thank you for Reading !!!