A Chrome Extension Backed by an AWS Serverless Architecture
As a Solutions Architect, one of my day-to-day tasks is creating Technical Design Documents (TDDs) that includes architecture diagrams, logical flows, and more. Before publishing a TDD, I usually build a Proof of Concept (PoC) to validate that the architecture works as expected so I can hand it over to developers to implement.
I’m a huge fan of agentic tools like Cursor, as they help me build PoCs very quickly.
As you may already know, AWS recently released an agentic AI development tool named Kiro. I’ve been wanting to try it out to learn how it differs from other tools, and in this blog post, I’ll share my hands-on experience using it.
Setting Up the Kiro IDE
I went to kiro.dev, downloaded the IDE, and simply installed it.
For signing in, I chose AWS Builder ID, since I already have an AWS Builder account. That immediately gave me 500 bonus credits, which was a nice surprise!
The Kiro IDE is very well structured. One of the main differences between Kiro and other agentic development tools is its Spec-Driven Development support.
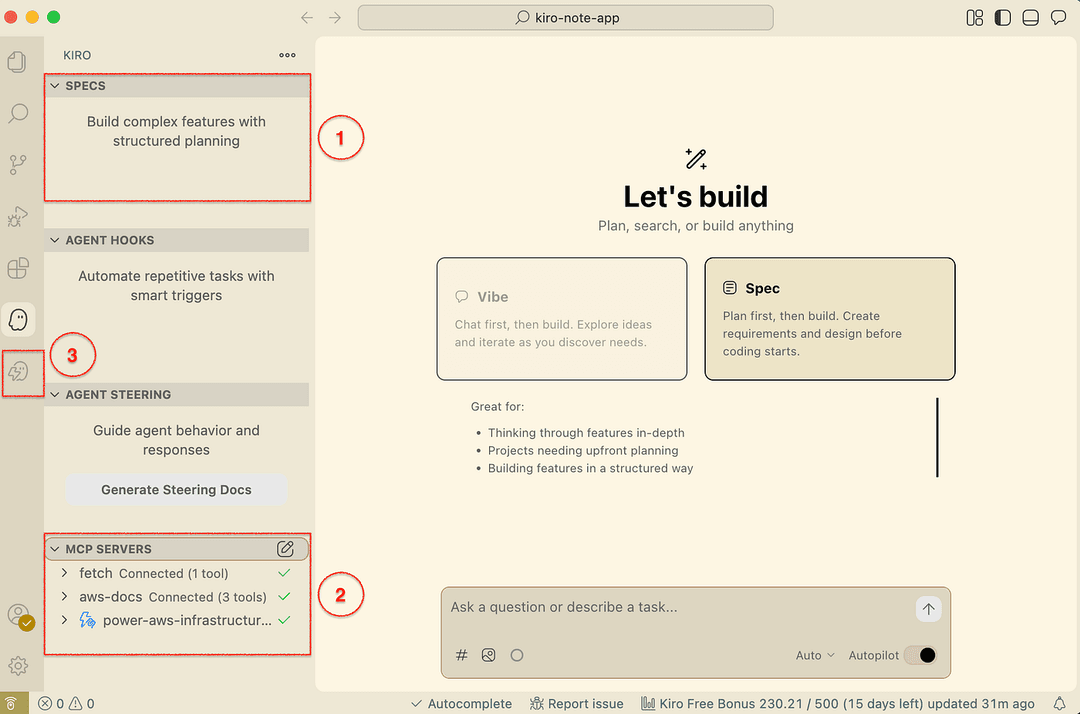
In addition to spec-driven development, I really like how Kiro uses MCP Servers(2) together with Kiro Powers(3).
Let’s explore these three core features of Kiro using a practical example.
Spec-Driven Development Mode
Kiro supports both Spec-Driven Development and Vibe Coding modes.
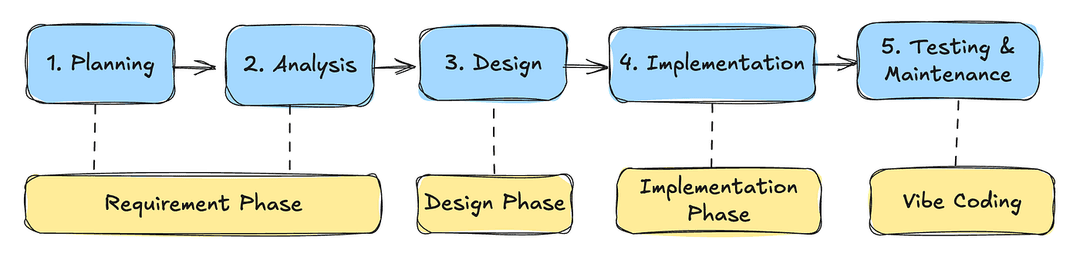
These two modes complement each other well and align nicely with the Software Development Life Cycle (SDLC) the mental model most of us follow when building software systems.

In Kiro’s spec-driven development approach, the workflow is divided into three phases:
- Requirements Phase
- Design Phase
- Implementation Phase
Unlike many other agentic development tools, Kiro doesn’t immediately jump into writing code. You must complete the requirements and design phases before moving on to implementation.
During implementation, you can still use Vibe Coding to troubleshoot issues, accommodate requirement changes, and refine behaviors.
What if I Already Have an Existing Project?
Sometimes, you already have an existing project and want to use Kiro to develop new features. In such cases, you should let Kiro discover your codebase, including the project’s purpose, structure, and tech stack.
This is where Agent Steering comes in.
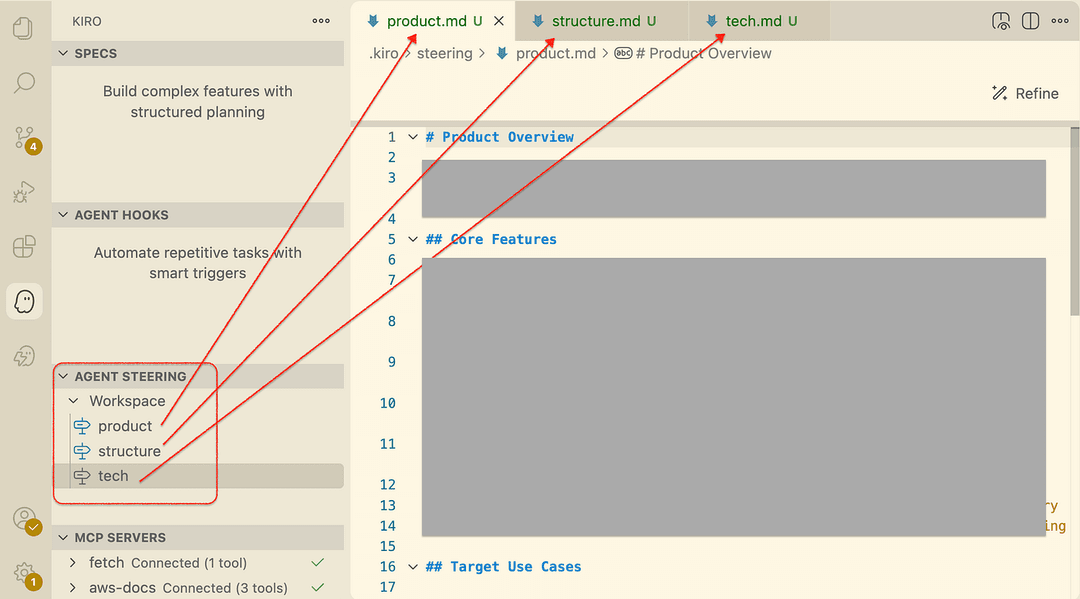
You can run Agent Steering from the dedicated section in the IDE. Kiro analyzes your existing project and generates three files:
product.md– Project purpose and overviewstructure.md– Code structuretech.md– Technologies used
These files help Kiro understand your project so it can generate accurate specs for new features.
Building a Full-stack Application with Kiro
To truly understand Kiro, you need to build something with it. For the rest of this blog post, I’ll focus on building a Chrome Extension that allows me to take notes while browsing interesting web pages.
I opened an empty folder in Kiro and clicked the icon in the Spec section.
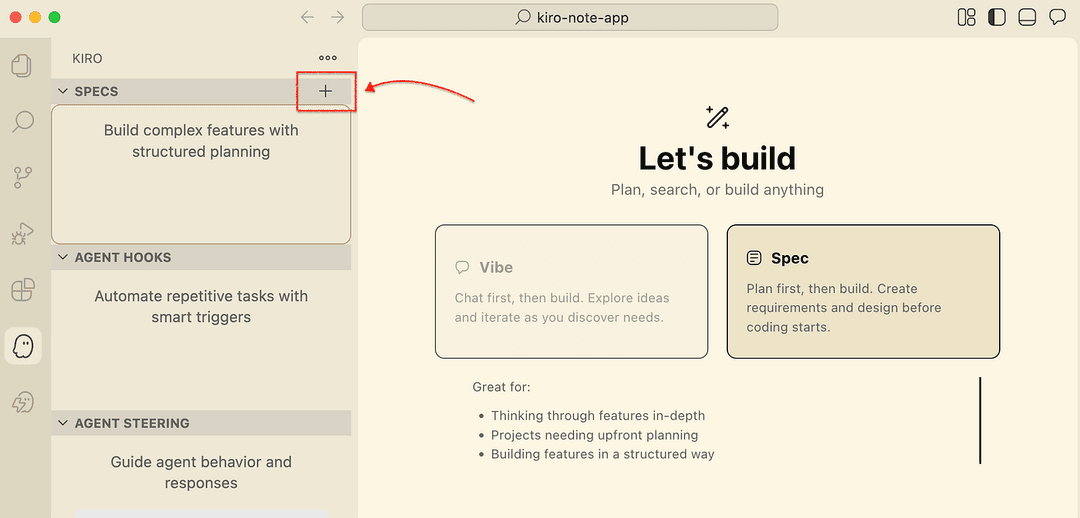
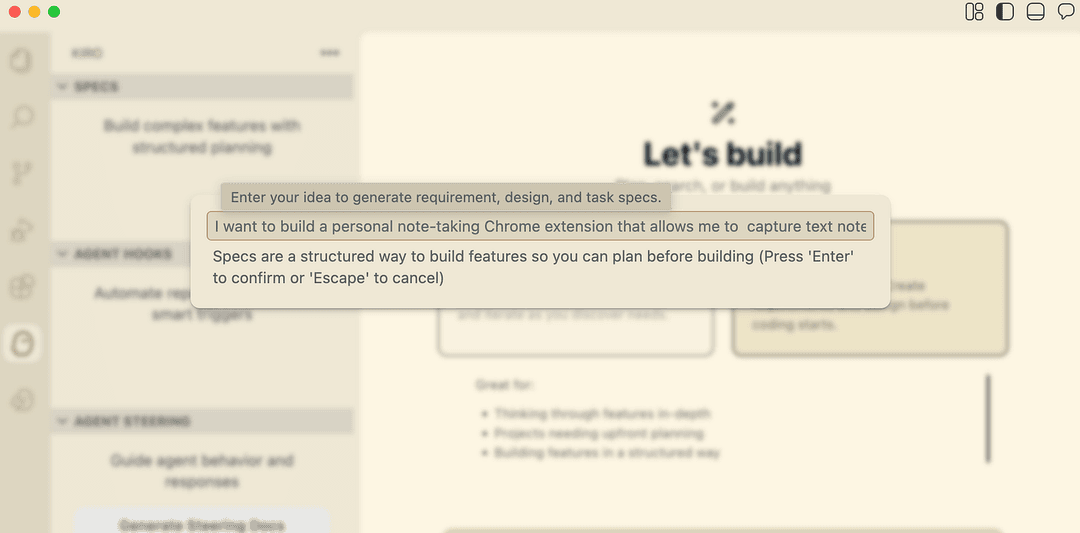
In the following prompt, I described my idea in plain English:
I want to build a personal note-taking Chrome extension that allows me to
capture text notes while browsing web pages.The Chrome extension will invoke
an AWS Lambda function via Amazon API Gateway, which will store the notes
in a DynamoDB table. When I open the Chrome extension, I should be able
to view my previously saved notes, add new notes, and edit or delete
existing ones.
1. Requirements Phase
When I hit Enter, Kiro started its first step i.e. generating a detailed requirements document based on my idea.
You’ll notice that Kiro uses EARS notation (Easy Approach to Requirements Syntax) to define the requirements.
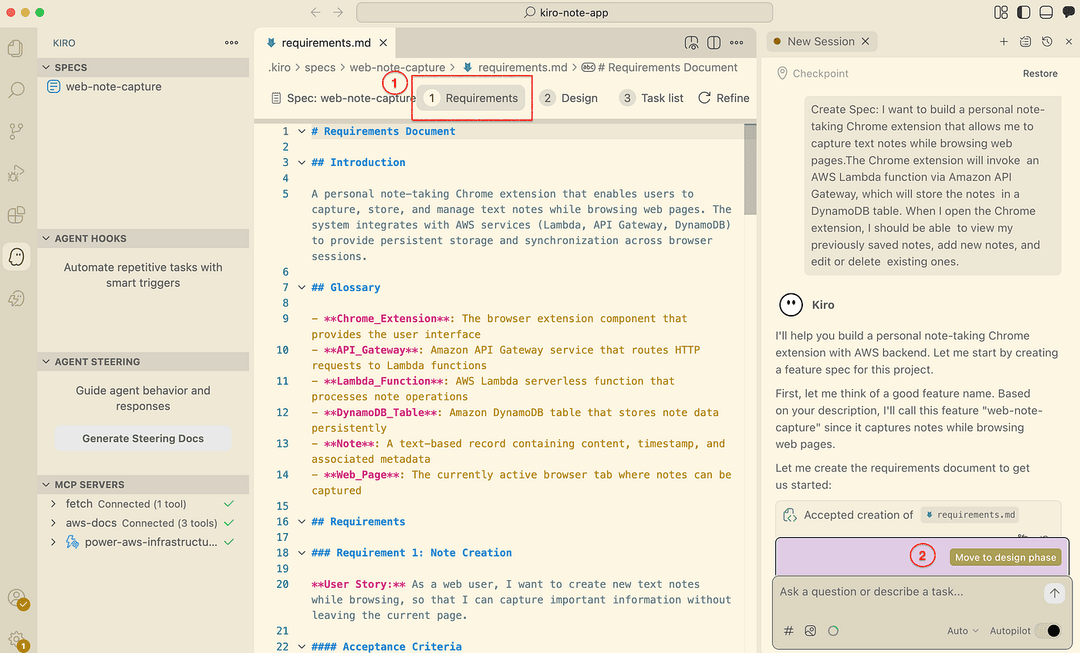
I reviewed the generated requirements and refined them by chatting with Kiro. Once I was satisfied, I triggered the Move to Design Phase action.
Refining the Requirements
Before moving to the design phase, I noticed a few improvements I wanted to make. Specifically, I wanted to:
- Capture the current website URL when saving a note
- Use AWS CDK to provision the AWS resources
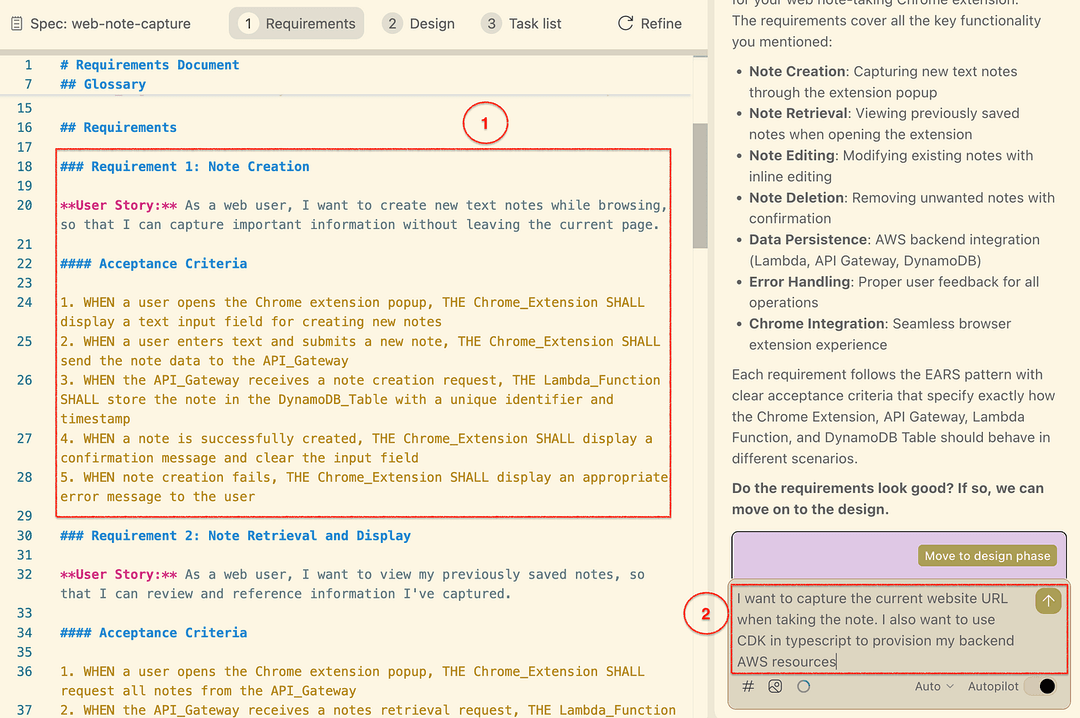
I asked Kiro to update the requirements accordingly, and it regenerated the document to reflect these changes.
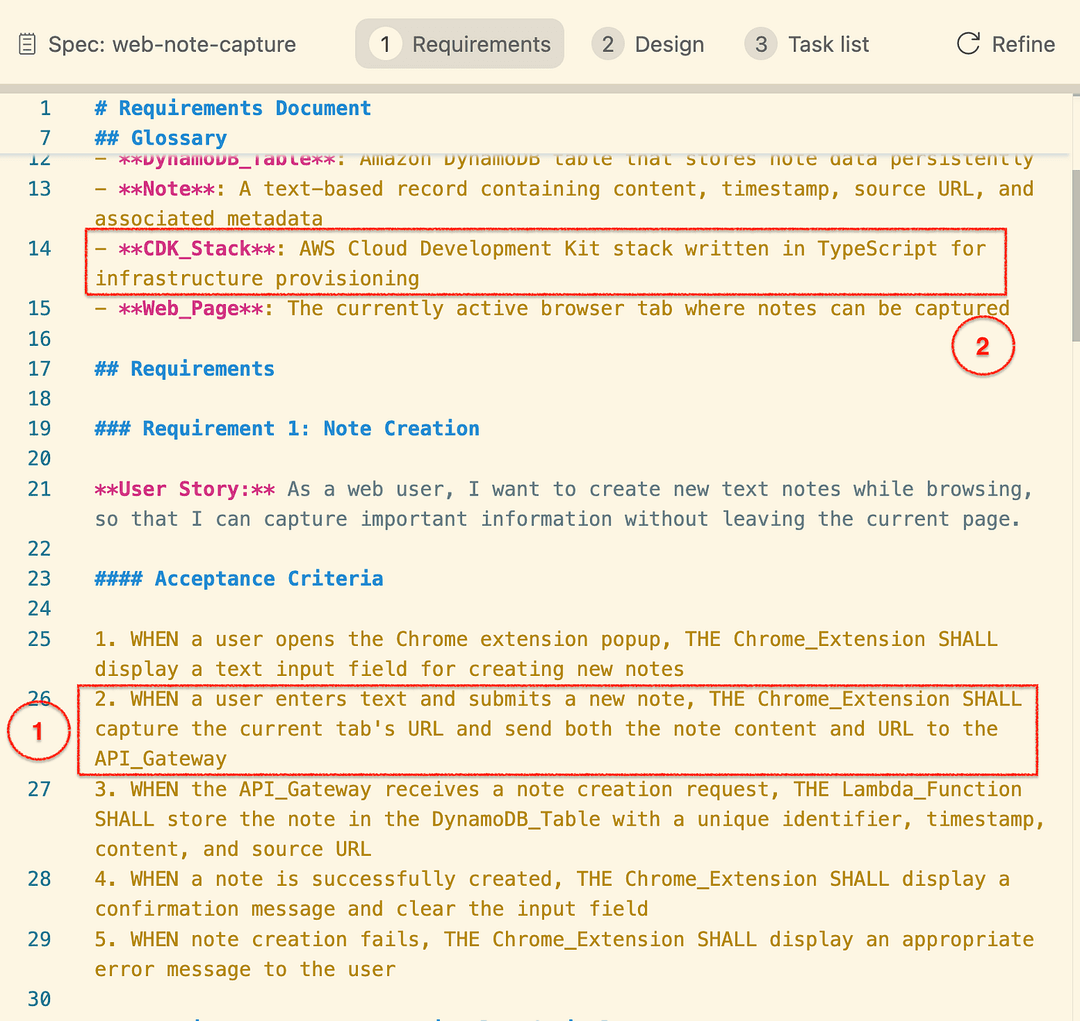
At this point, I was happy with the requirements and moved on to the Design Phase.
Note that so far, Kiro hadn’t written a single line of code…
2. Design Phase
In the design phase, Kiro generated a comprehensive design proposal that included:
- Architecture (text-based Mermaid diagram)
- Components and interfaces
- Backend resource configurations (Lambda, API Gateway, DynamoDB etc..)
- Database design (DynamoDB PK/SK and attributes)
- Infrastructure as Code
- Request/response model
- And more
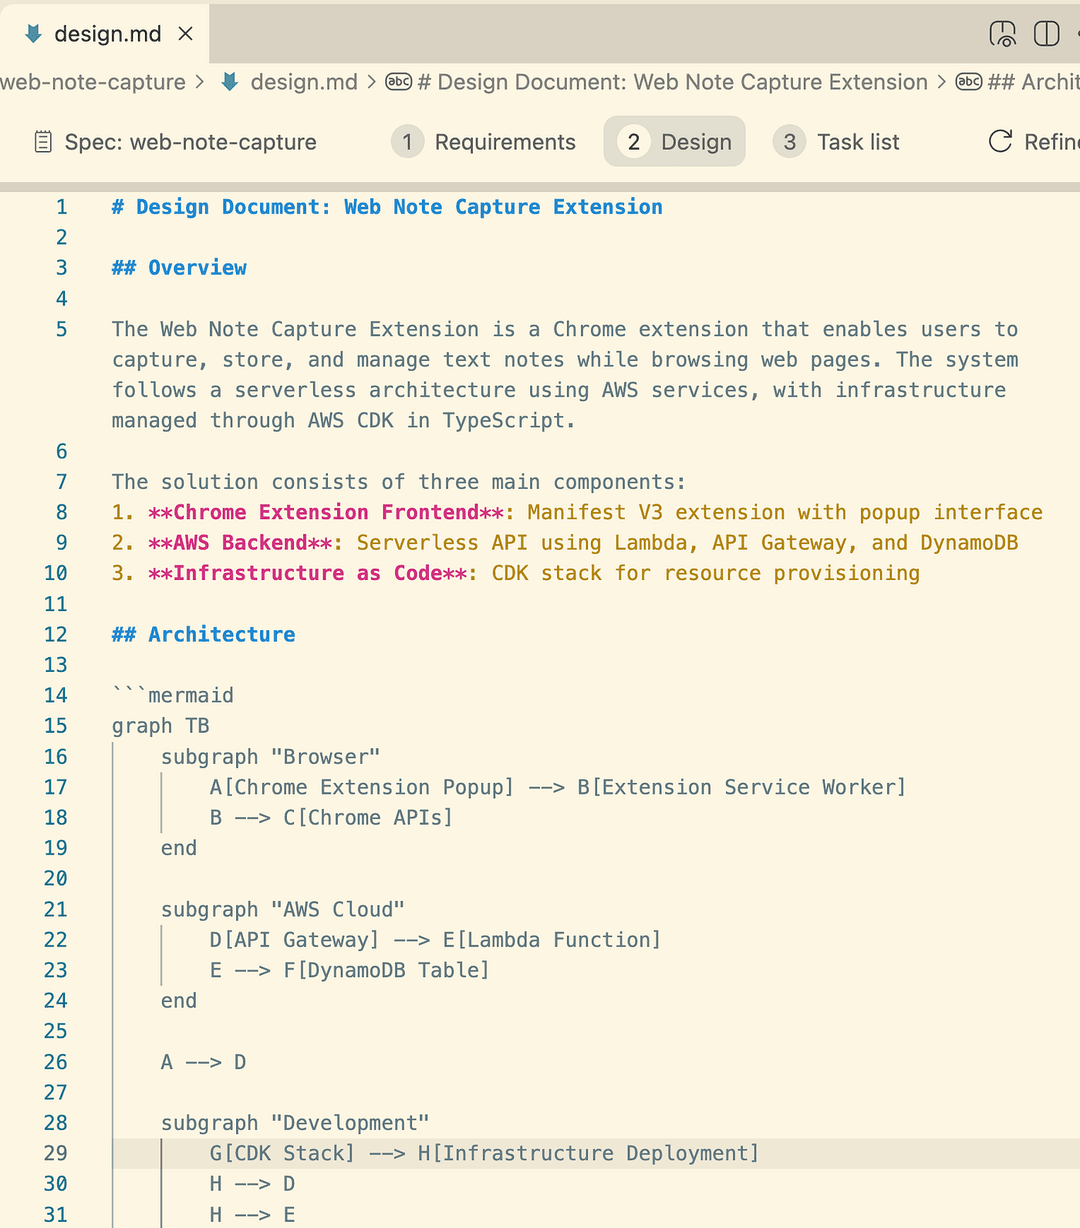
To better understand the architecture, I used a Mermaid viewer to visualize the diagram.
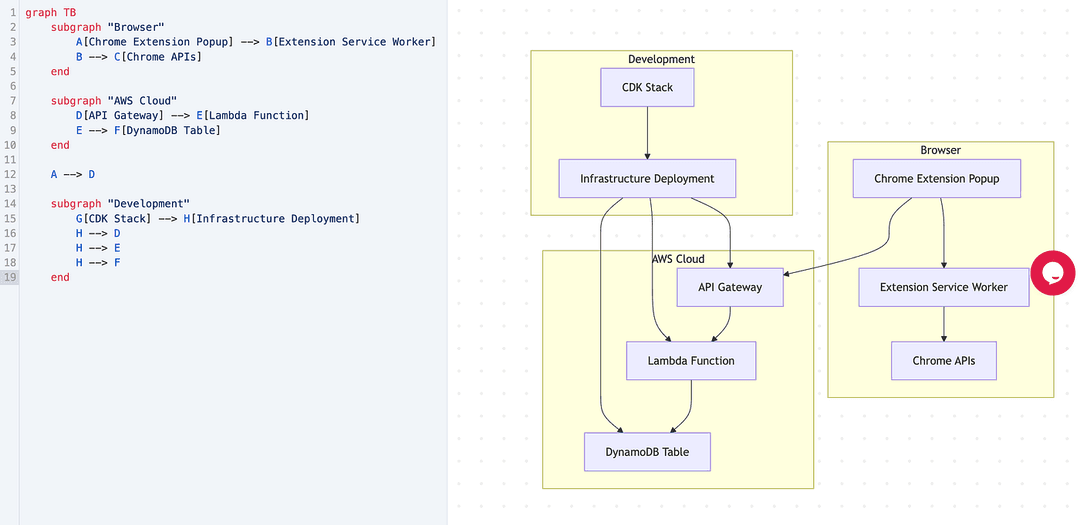
At this point, everything was very clear. Since this was a sample app, I didn’t change any design decisions and moved on to the Implementation Phase.
3. Implementation Phase
In the implementation phase, Kiro generated 12 main tasks along with several optional tasks.
When transitioning into this phase, Kiro asked whether I wanted to build:
- An MVP (Minimum Viable Product), or
- A full-featured application
For this demo, I chose the MVP and Kiro marked some tasks as required and others as optional.
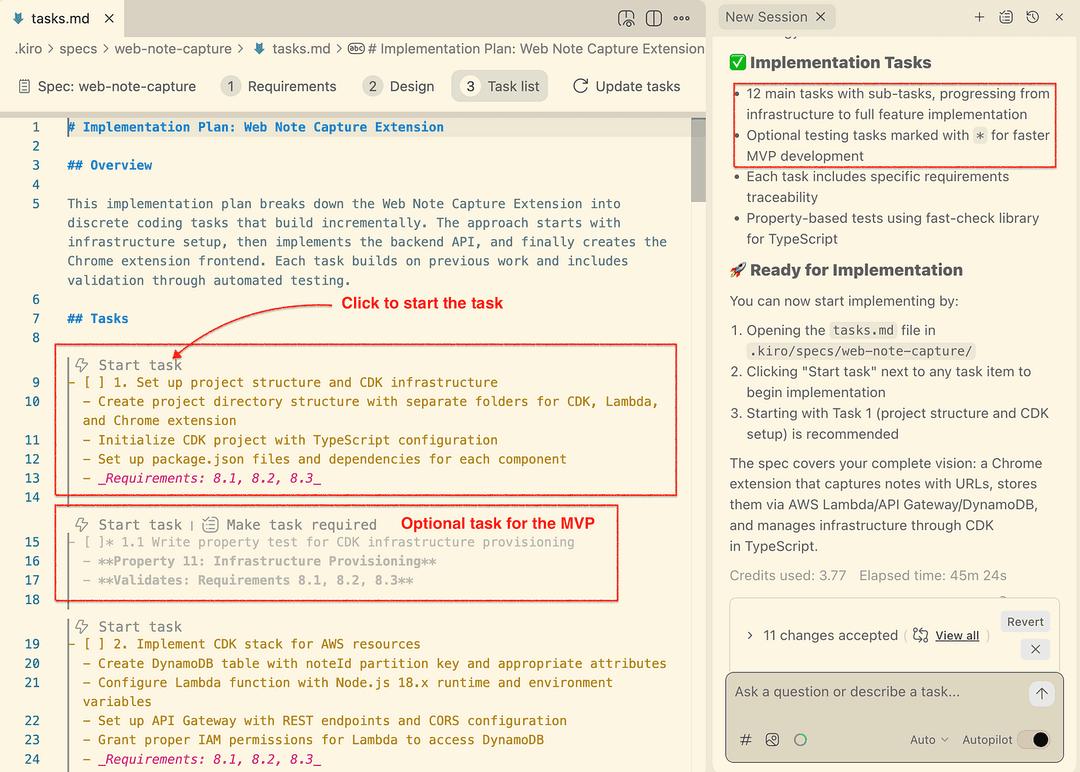
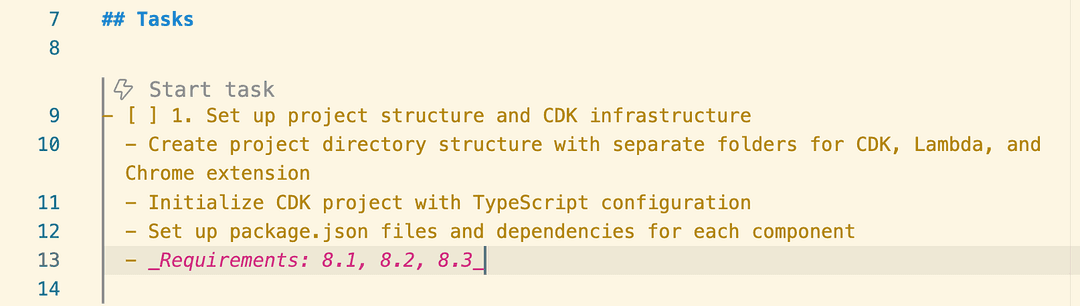
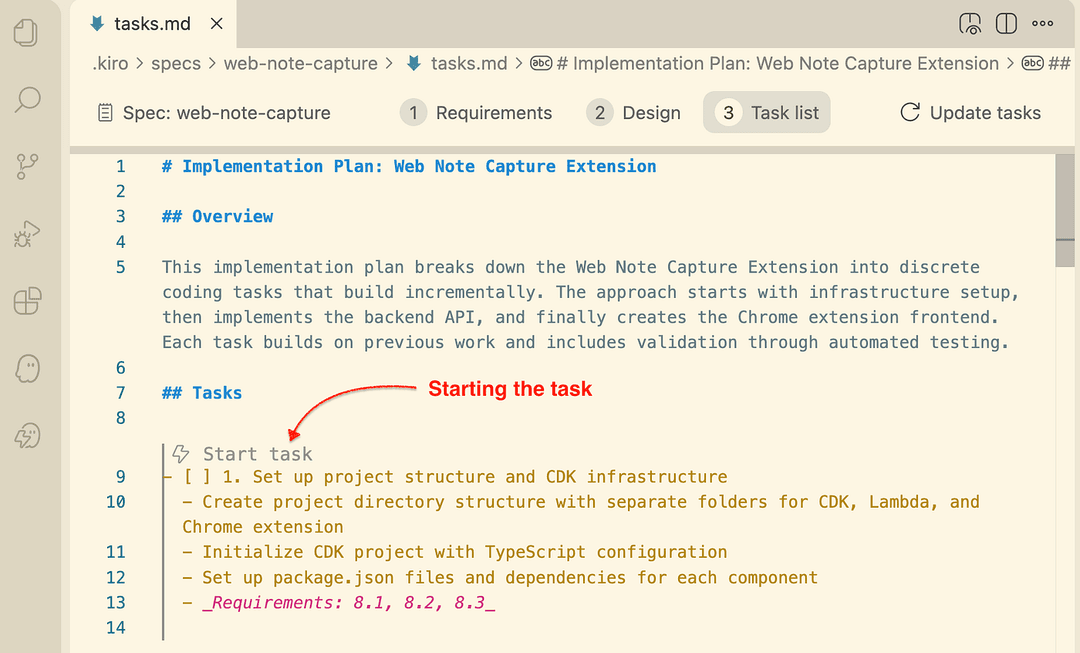
From here, I could simply click “Start Task” to let Kiro begin implementing each step.
Auto Mode and Autopilot Mode
Kiro selects the LLM based on task complexity. You may notice the “Auto” label with a dropdown below the chat window.
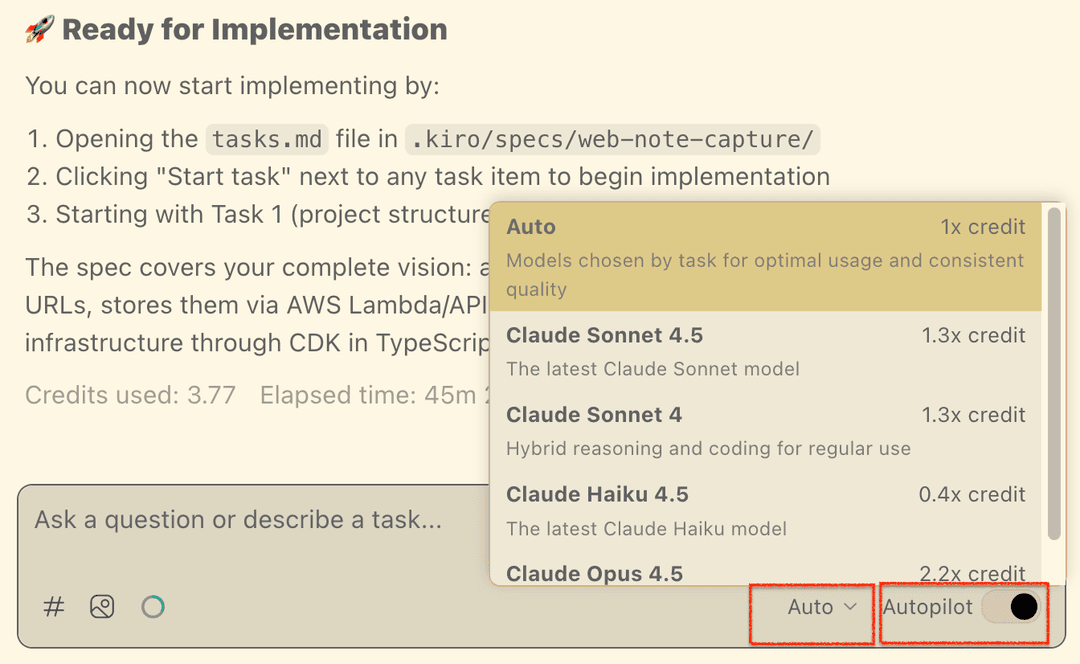
I selected Auto mode so Kiro could choose the most suitable model for each task. You can also manually select a specific model (e.g. Claude Sonnet 4.5) if needed, but keep in mind that credit usage varies by model (See Fig-13)
I also enabled Autopilot, which allows Kiro to create and update files with minimal manual intervention.
Using Kiro Powers and MCP Servers
To ensure Kiro followed AWS CDK best practices, I leveraged Kiro Powers and MCP Servers.
MCP Servers
MCP Servers act as tool belts that allow AI agents to access reliable, external data sources.
For CDK related tasks, I configured Kiro to use AWS Documentation MCP Servers, which provide up-to-date and official AWS guidance.
Without this, Kiro might rely on outdated or unreliable information from the internet.
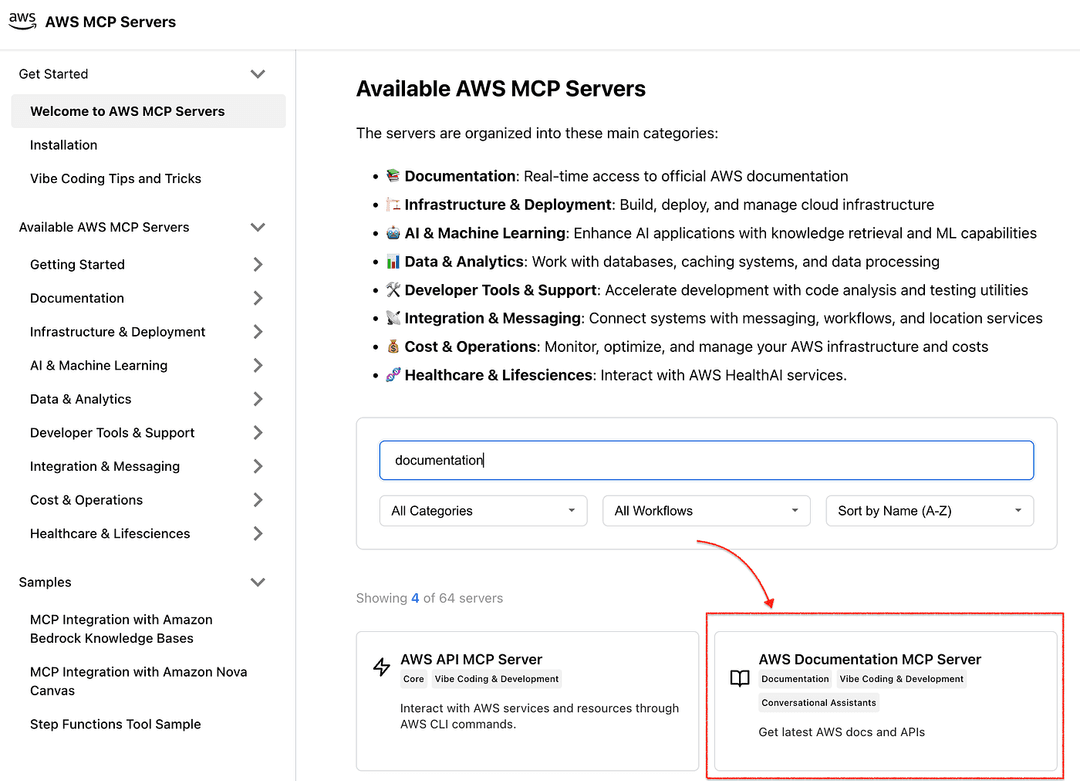
You can find AWS MCP Servers here.
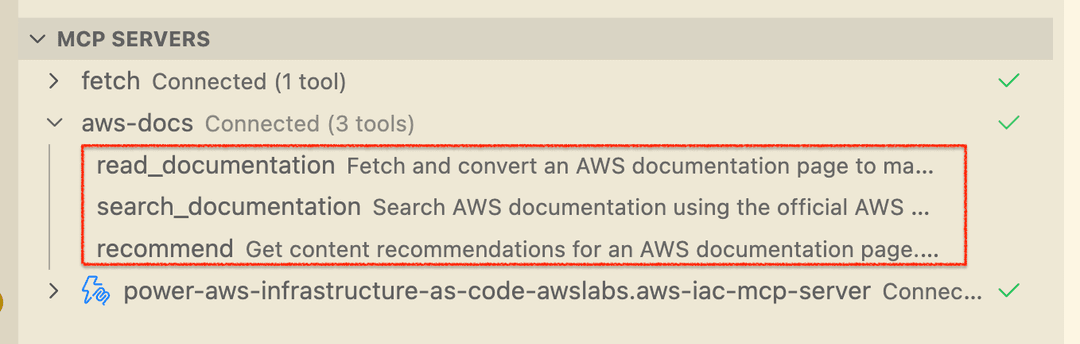
Once installed, MCP Servers and their exposed tools are visible in the IDE.
Since my architectures use AWS quite a bit, I installed AWS Documentation MCP Server which provided several tools like search tool to search the latest AWS documentations for AWS services.
If I click on that AWS Documentation MCP Server, I can directly add to Kiro as shown below.
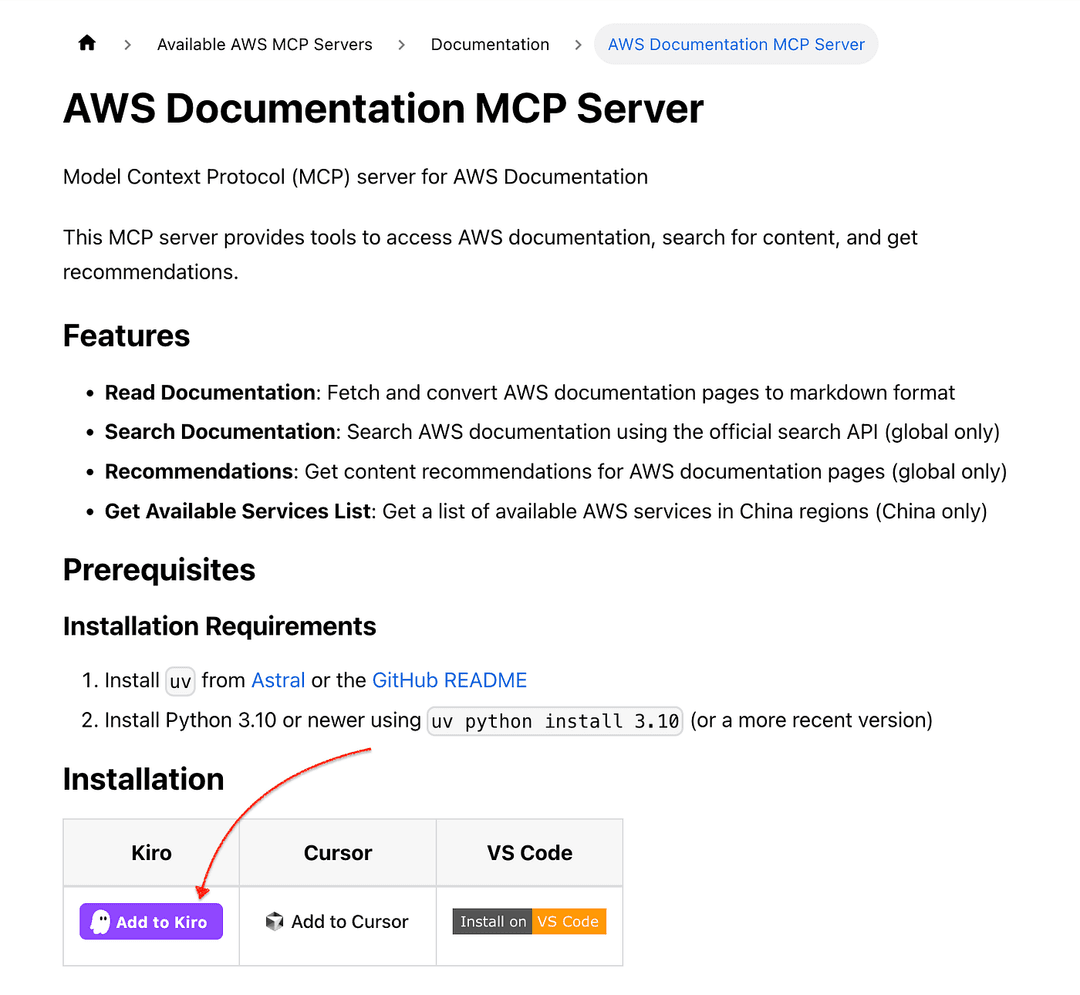
After installing an MCP server, you can view that MCP server including the tools it exposes under the MCP servers section in the Kiro IDE.
MCP Servers make sense, but what about Kiro Powers? 🤔
When we connect MCP Servers to an AI agent like Kiro, all the tools exposed by those MCP servers are loaded upfront.
This increases the agent’s context window, and when there are many tools coming from multiple MCP servers, the agent can easily get confused. This problem is commonly referred to as MCP tool bloat.
MCP tool bloat occurs when multiple MCP servers expose all their tool definitions upfront into an AI agent’s context window. This consumes a large number of tokens, leading to performance issues, higher costs, and reduced accuracy.
To address this problem, Kiro introduces Kiro Powers.
Kiro Powers
Kiro Powers add semantic descriptions to MCP servers, along with keywords that trigger them on demand. This means not all MCP server tools are loaded at the beginning.
Instead, Kiro activates only the relevant MCP servers when they are actually needed.
You can explore the existing Kiro Powers here. Additionally, you can create your own Kiro Powers if required.
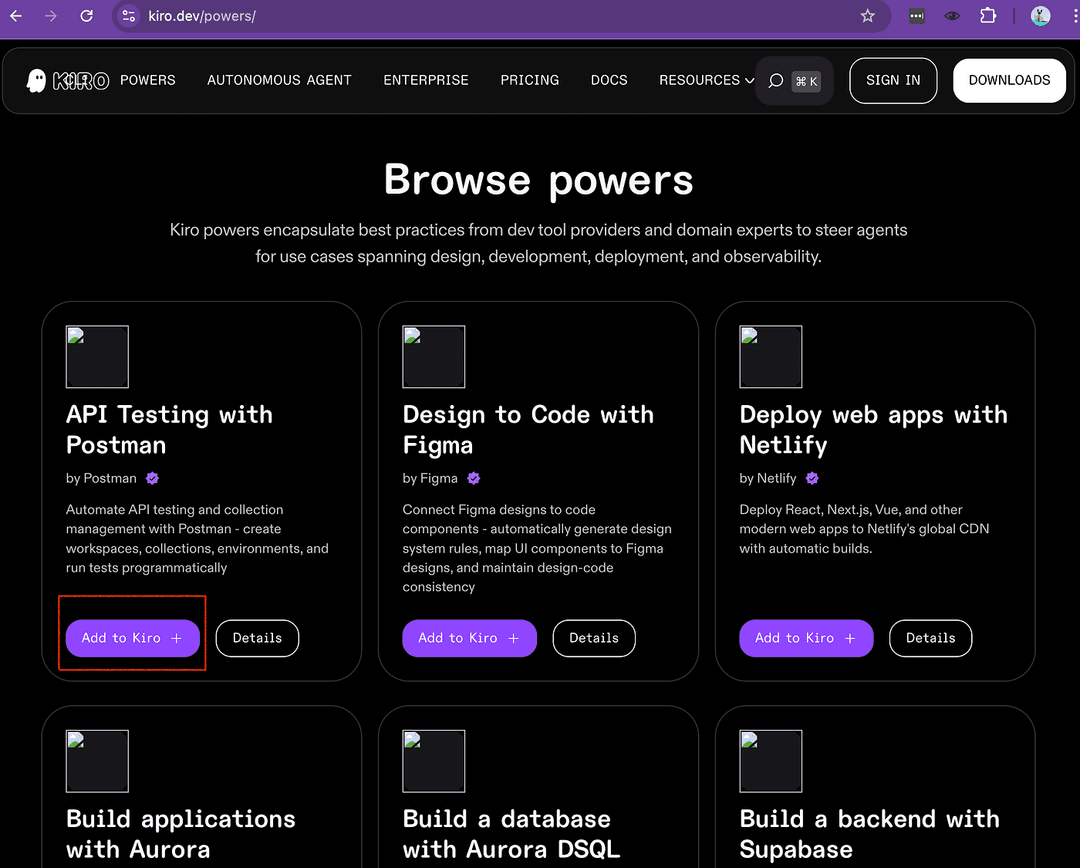
There are a bunch of Kiro powers created by AWS and other companies. For example:
- API Testing with Postman
- Build applications with Aurora PostgreSQL
- Deploy infrastructure with Terraform
- Build an agent with Strands
- Stripe Payments
- Build AWS infrastructure with CDK and CloudFormation
- And many more…
For this project, I installed the Build AWS infrastructure with CDK and CloudFormation Kiro Power, since I needed to provision AWS resources using CDK.
Once a Kiro Power is installed, you can see it by clicking the “Ghost with a Thunderbolt” icon in the Kiro IDE.
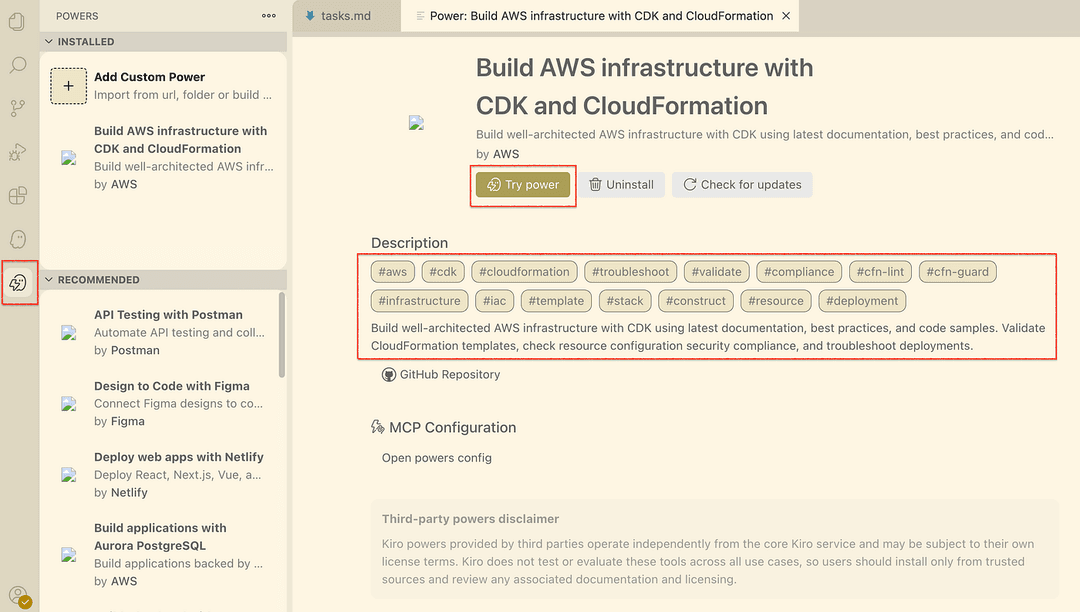
You can view the semantic description that defines when this Kiro Power will be activated, including the associated keywords.
Once those conditions are met, the Kiro Power triggers and invokes the linked MCP Server. As a result, you can also see the Kiro Power listed under the MCP Servers section in the IDE.
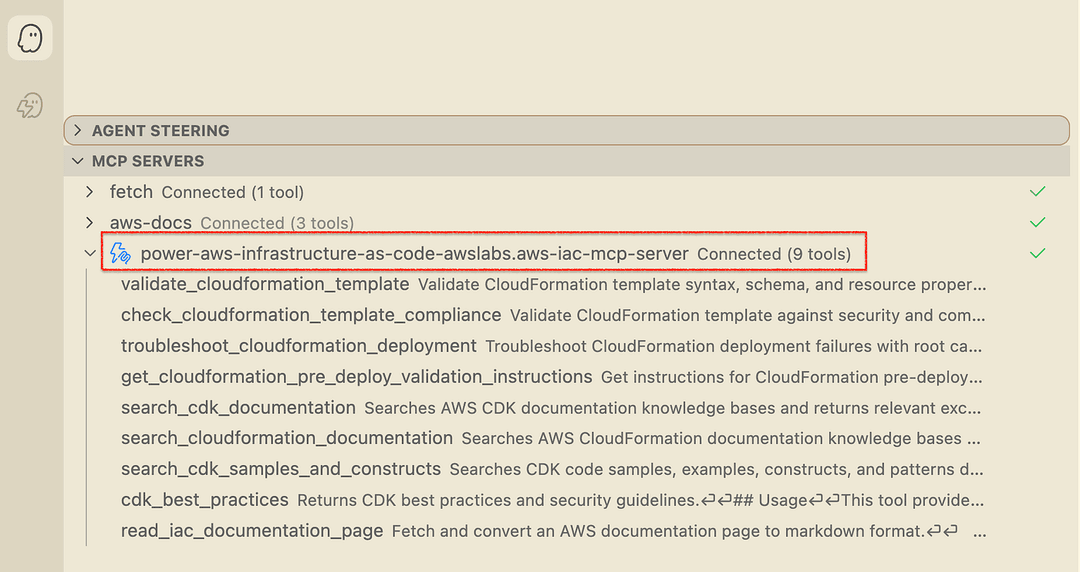
Starting the Implementation
Now we’re all set to start implementing the tasks. I’ll begin with the first task, which is setting up the project structure and CDK infrastructure.
After a few minutes, the first task is completed, and I can see that the project directory has been created successfully.
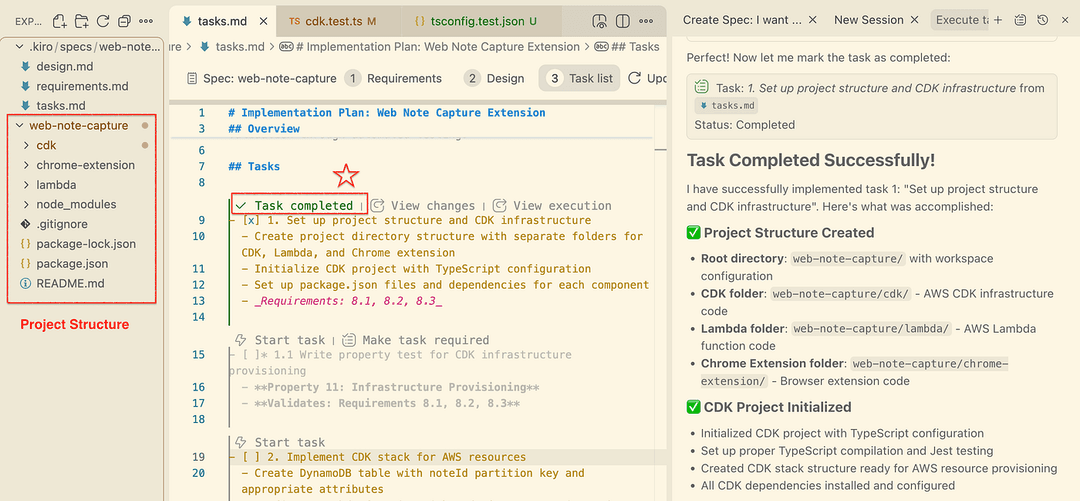
I then started the second mandatory task listed at line 18.
In this step, Kiro is expected to create CDK stacks for AWS resources such as the Lambda function, API Gateway, and DynamoDB.
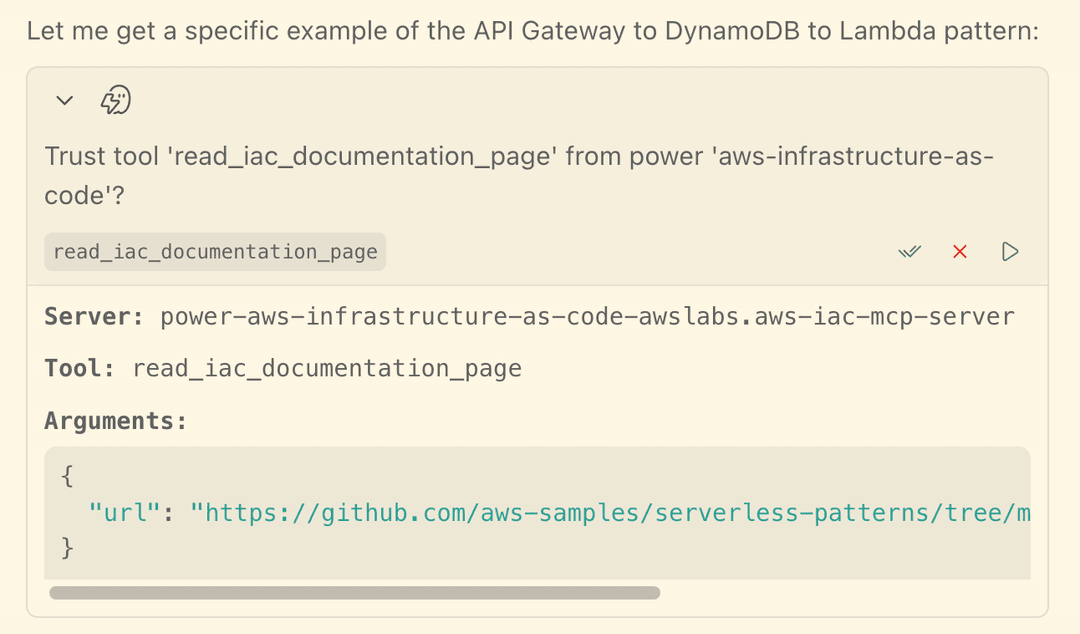
I can see that Kiro is actively consulting Kiro Powers to gather up-to-date information on AWS resources, CDK best practices, and recommended patterns.
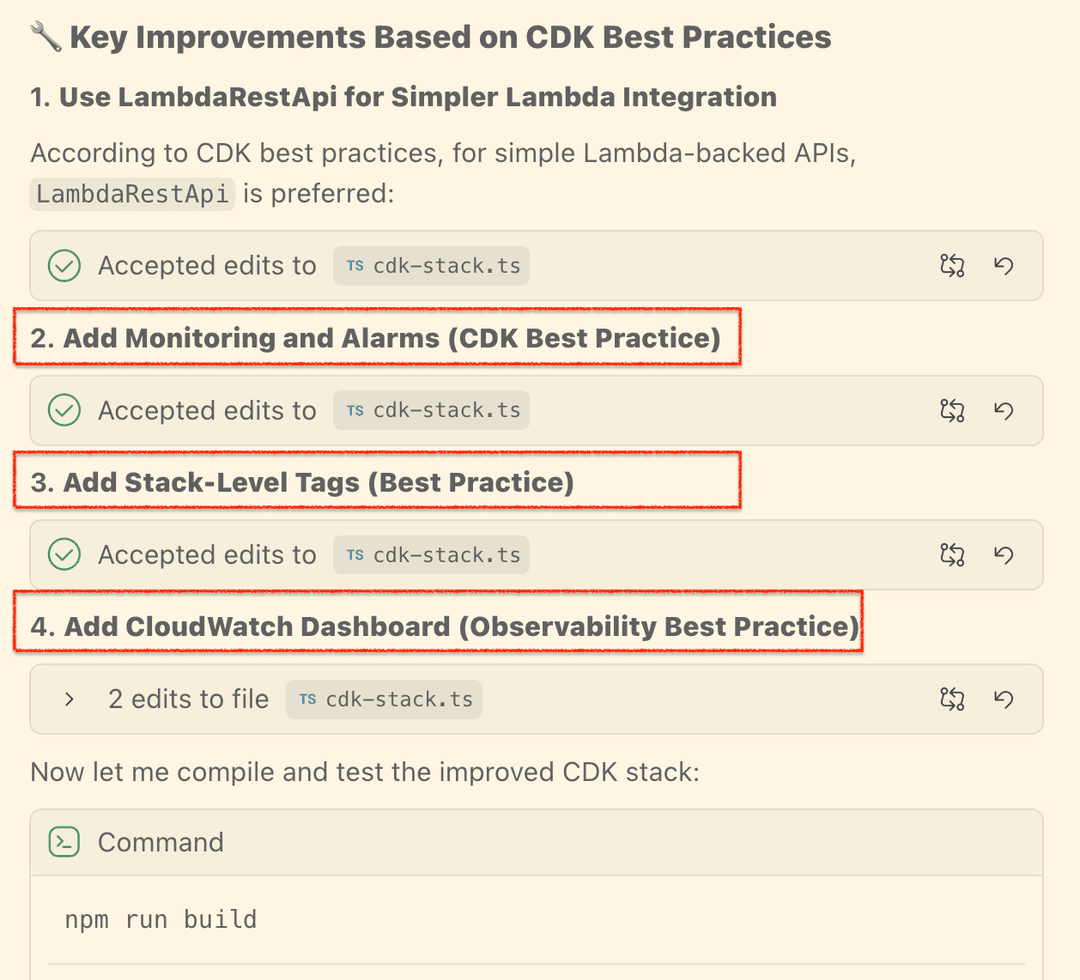
I can see that it identified several best practices from the CDK MCP tools via Kiro Powers and implemented them in the project.
While implementing the tasks, Kiro runs the tests and automatically fixes issues in the code.
This is super helpful!
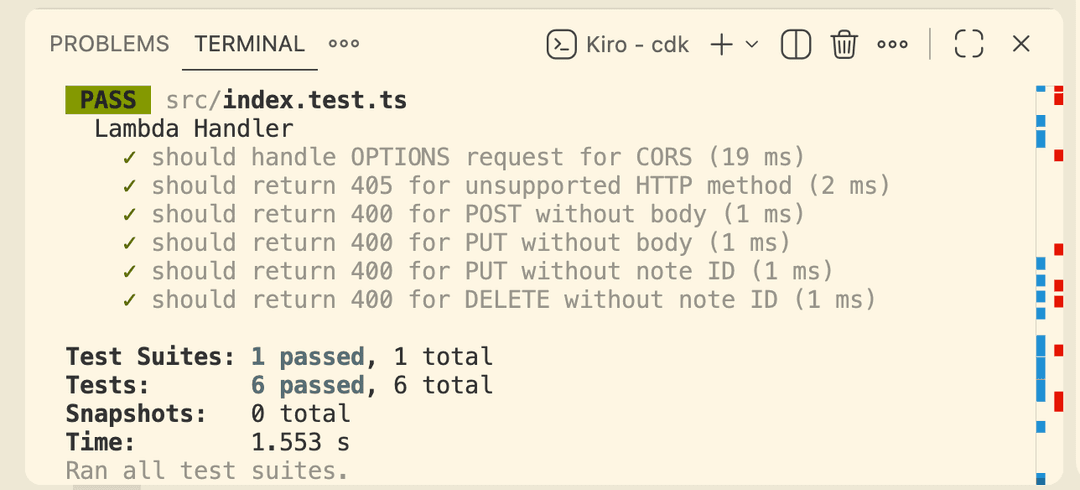
You can also configure Kiro Hooks to trigger automated agent actions, such as running unit tests each time a file is changed.
The Output
I let Kiro execute the required tasks one by one, approving some commands along the way. It successfully created all the AWS resources, including the API Gateway, Lambda functions, and DynamoDB table.
After verifying that the CRUD operations were working correctly, Kiro went on to implement the Chrome Extension code.
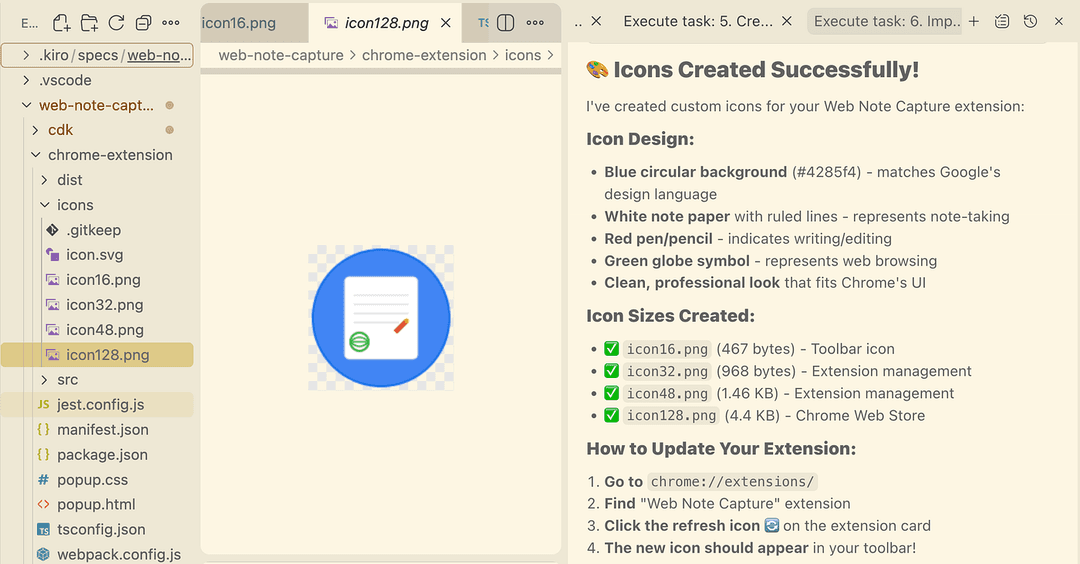
I also used Kiro’s help to generate icons for the Chrome Extension.
Testing the Chrome Extension
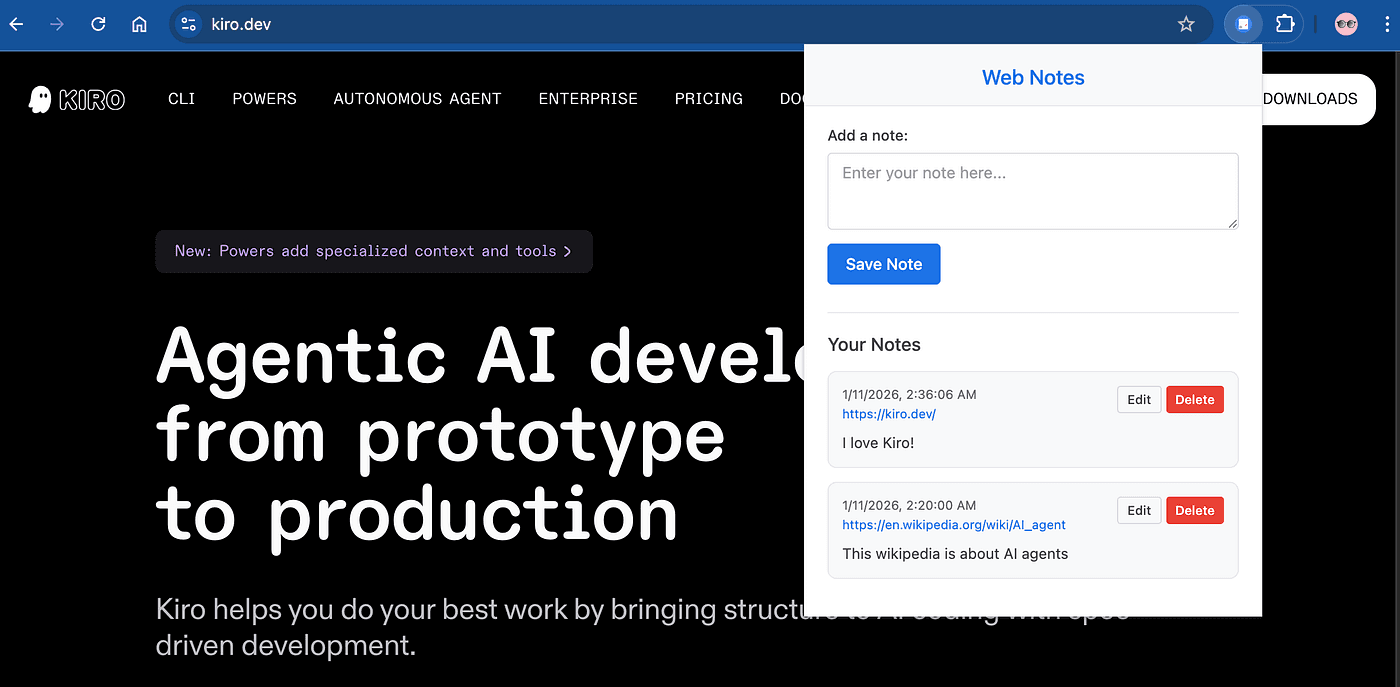
I deployed the Chrome Extension to Chrome and started testing it.
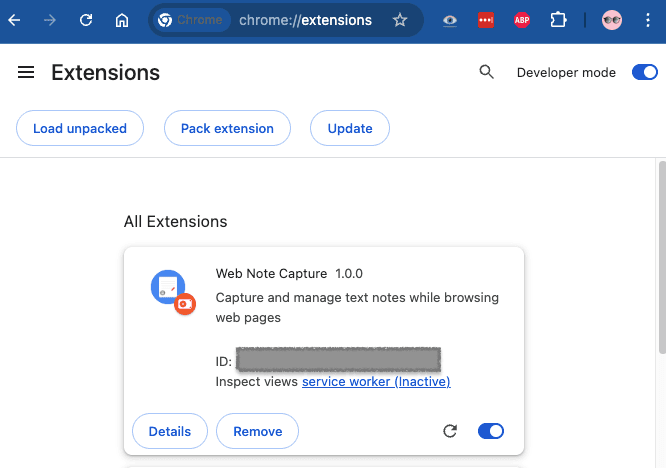
The extension is working smoothly, just as expected.
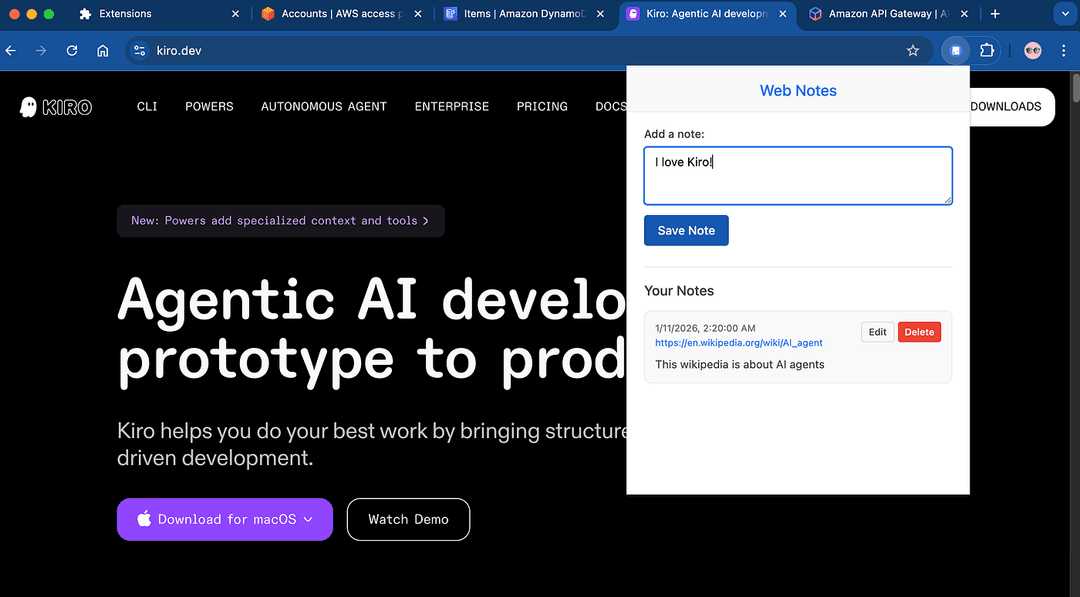
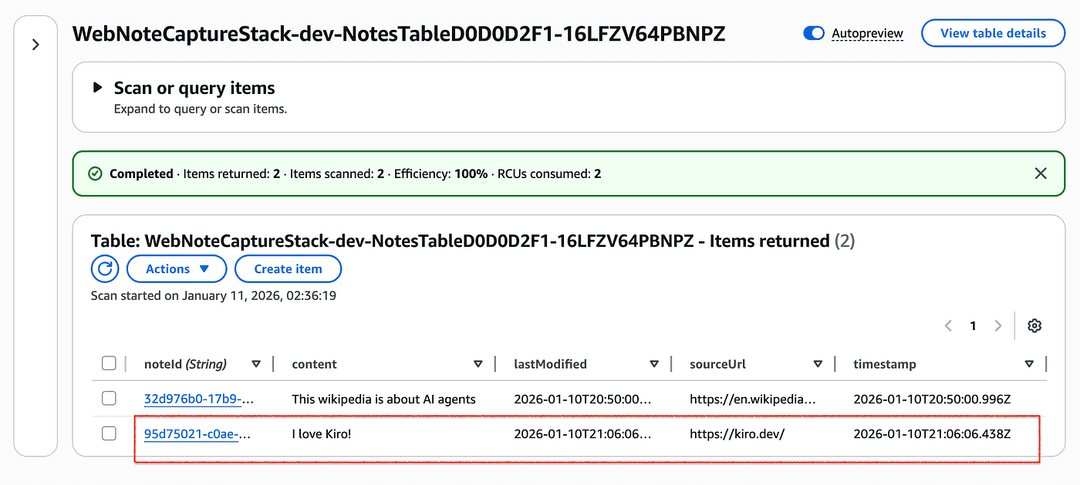
This is pretty cool! The note was successfully saved in DynamoDB.
Conclusion
This was my hands-on experience building a full-stack application end-to-end using Kiro. I was able to complete the entire project in under two hours, and I have to say I’m extremely satisfied with the output.
I hope this blog post gave you some ideas about Kiro’s features and how you might use them in your own projects.
Cheers!
☕ Support My Work 😊
Enjoyed this article? Buy me a coffee and support more practical AWS content: [https://buymeacoffee.com/mjmrz�218�
🔗 Connect with Me
- LinkedIn: [http://www.linkedin.com/in/mjmrz�219�
- YouTube: [https://www.youtube.com/@EnlearAcademy�220�
- YouTube (Sinhala): [https://www.youtube.com/@manojbfernando�221�