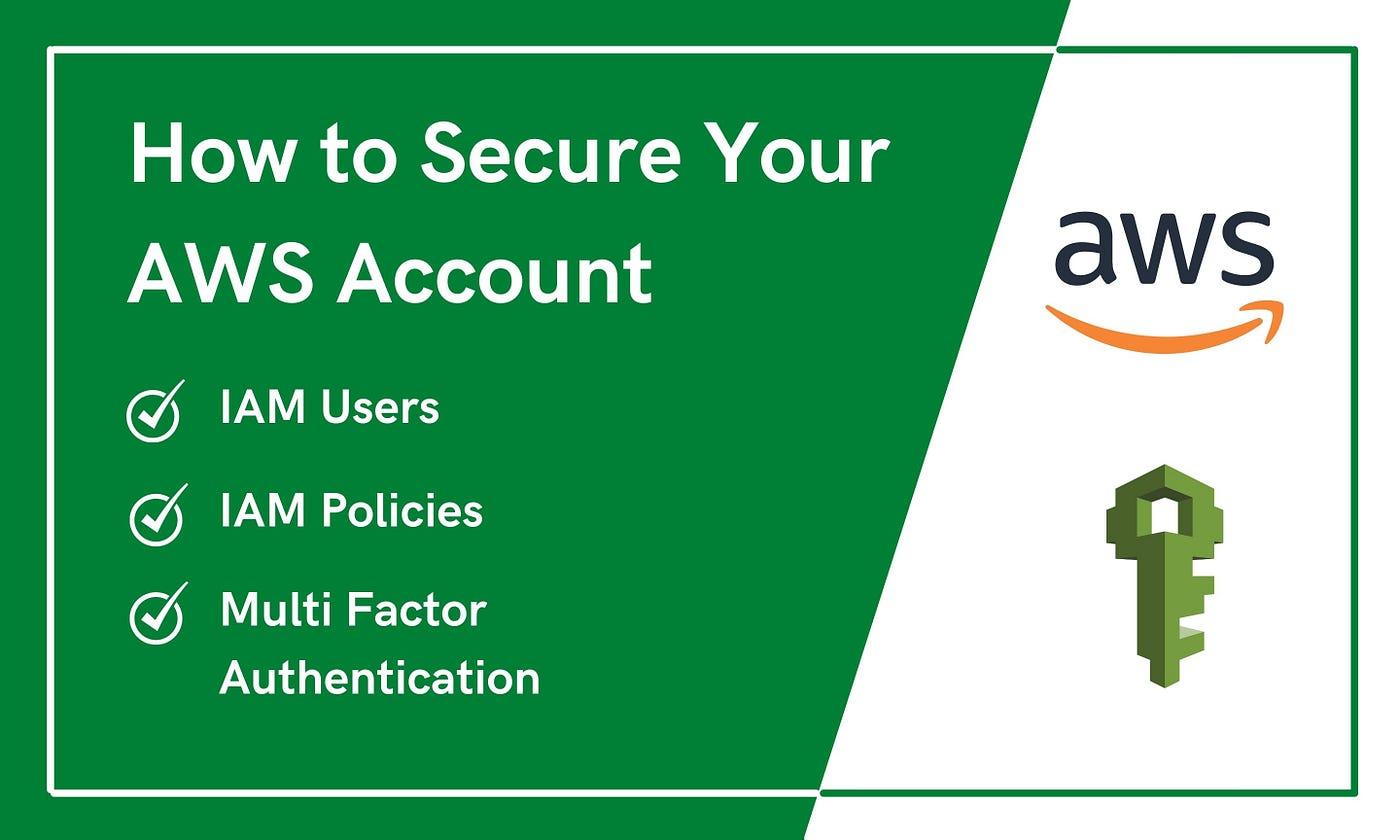
IAM is the Identity and Access Management service provided by AWS. It provides you with a variety of options to manage users and secure your account.
But, most developers do not get the maximum out of it since they are not aware of all the features of IAM.
So, In this article, I will discuss how to use IAM groups, policies, permissions, and multi-factor authentication to secure your account.
IAM Users, User Groups, and Policies
In AWS, there are 2 types of users. The first user type is the Root User, and this user account is automatically created when you create an AWS account.
Root user account has access to all services and settings in AWS account, and that’s why you should not share or use its credentials anywhere else.
IAM accounts resolve this issue by allowing you to create separate user accounts from your root account with different permissions and policies.
For example, if your team has 4 software engineers and 2 DevOps engineers, you can create 6 IAM accounts for them by only attaching the necessary permissions. Also, IAM accounts are helpful when you use AWS services like S3, lambda in your applications.
Creating an IAM user is pretty much straightforward. All you need to do is search IAM in was service list and continue the Add user wizard.
Step 1 — Selecting access type
As the first step, you will be required to enter a name and access type. Since I’m creating this account for a developer in my team, I have selected AWS Management console access as the access type.
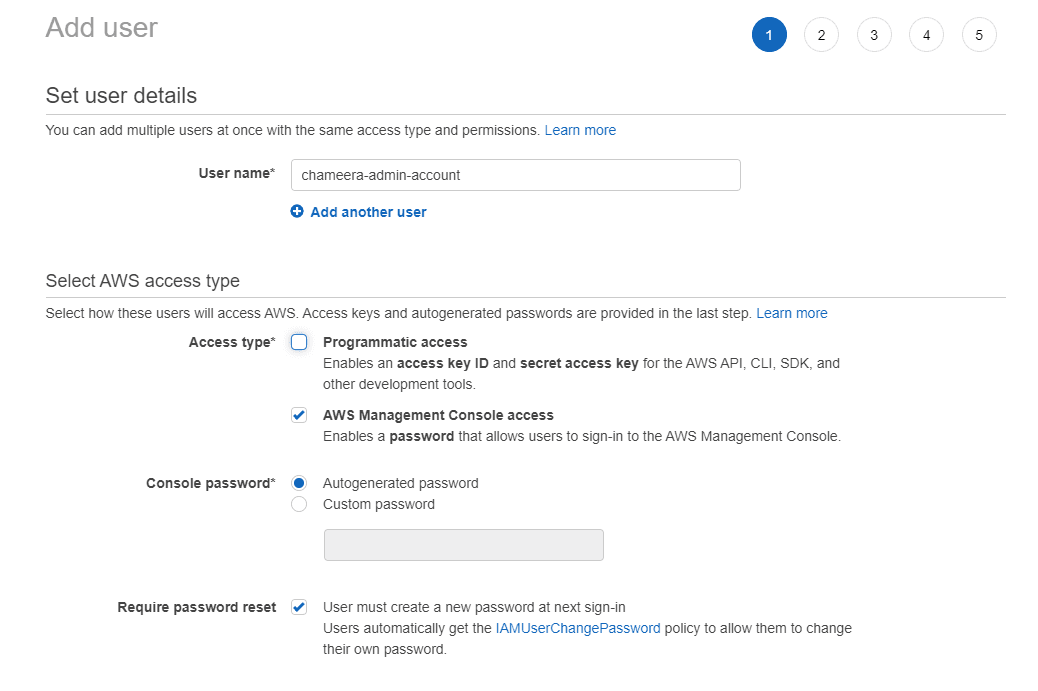
Note: Programmatic access is mostly used in AWS APIs and SDKs
Step 2 — Attaching user groups and policies
Next, you can add this user to a user group or attach policies directly.
With user groups, you can easily attach permissions to new users without configuring them every single time.
As I explained earlier, you can create a single user group as developers, configure permission and add all developer accounts to that user group.
Make sure that you assign minimal required permission to users when you create new users.
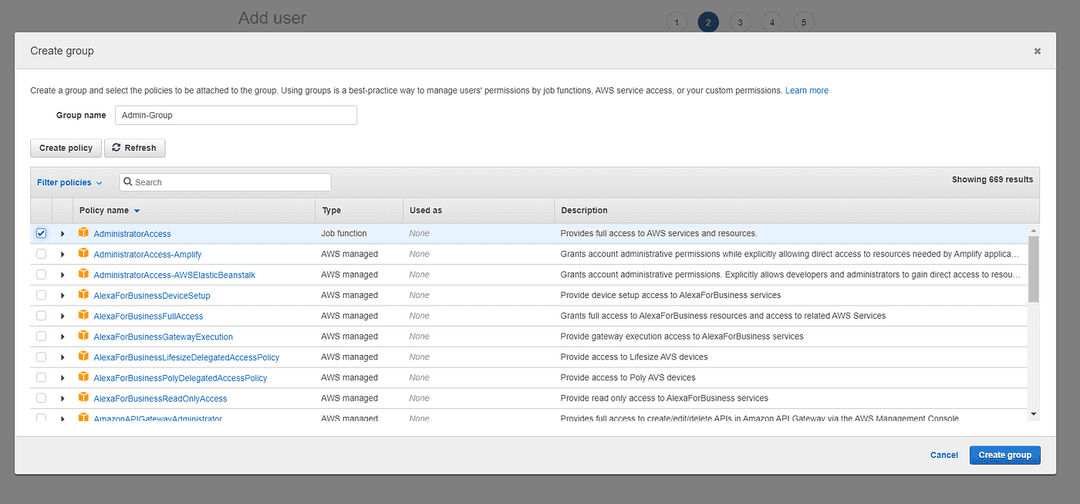
In my case, I have created a new group called the admin group and attached the AdministratorAccess policy to that group.
If not, you can create custom policies using the visual editor or the JSON editor provided by AWS.
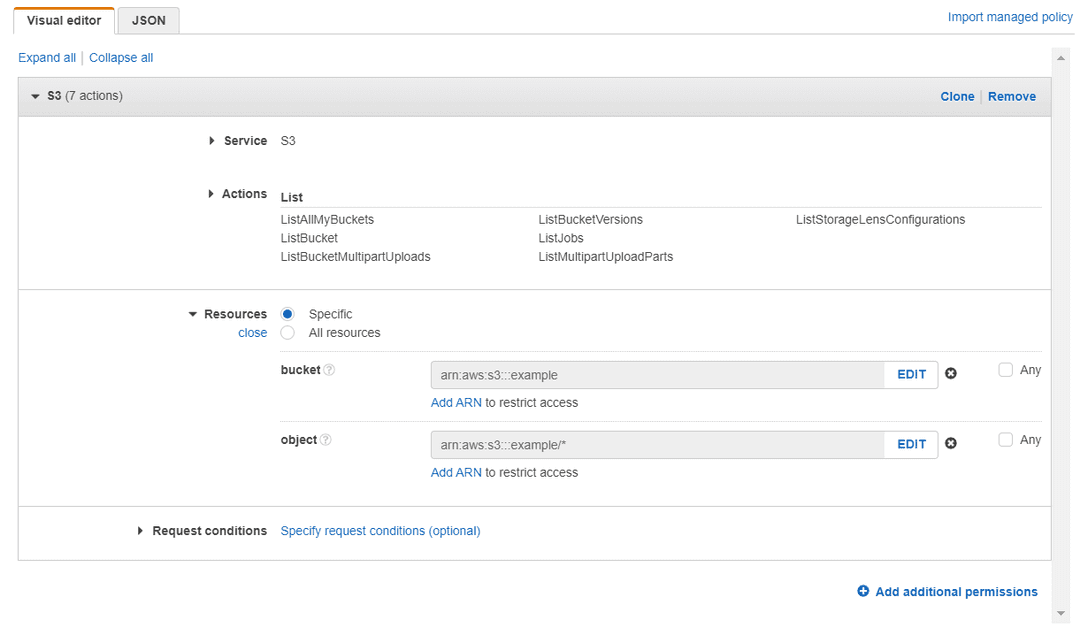
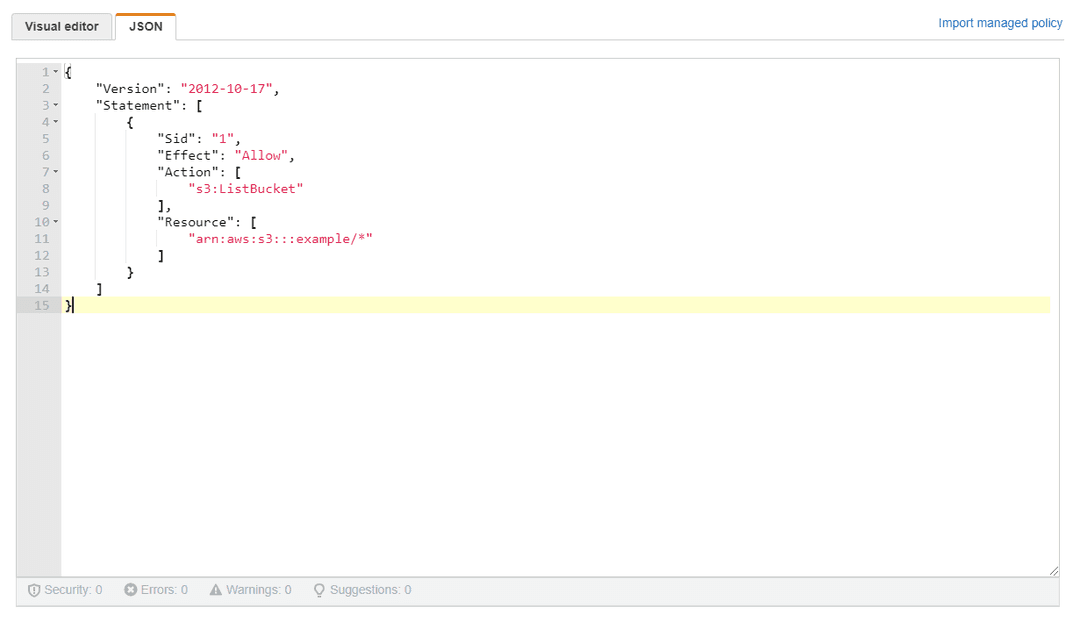
Although the visual editor simplifies the process, it is always good to know the JSON policy creator.
For example, the above policy contains a single statement. Sid is used to identifying that statement uniquely. Effect property is used to define the statement Allows of Deny access to the resource, and Actions define all the Allowed or Denied actions. Finally, Resouce property defines the resources that all these actions are allowed or not.
Step 3 — Review and complete the wizard
After attaching permissions, you can finalize the wizard and you will receive a unique sign-in URL as well.
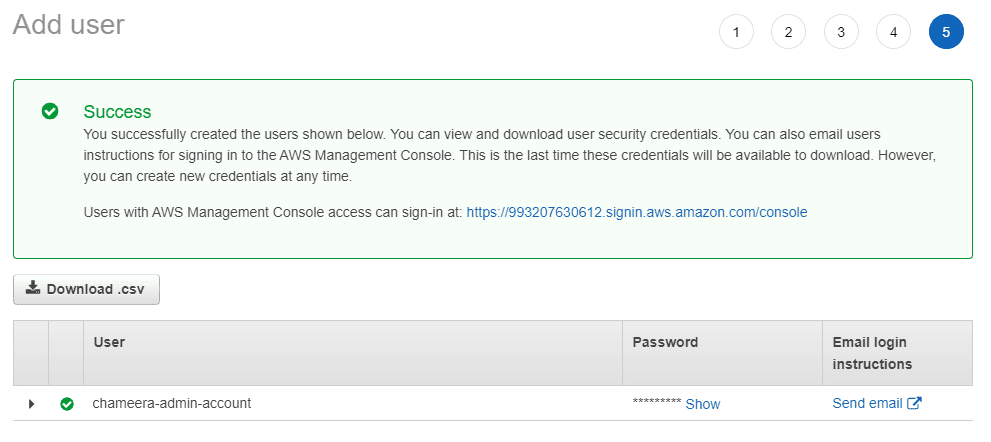
That’s it. Now you can use that URL and credentials to log in to your AWS account.
However, there are few things I would like to highlight about IAM users before moving into the next section.
You can attach multiple groups to a single user.
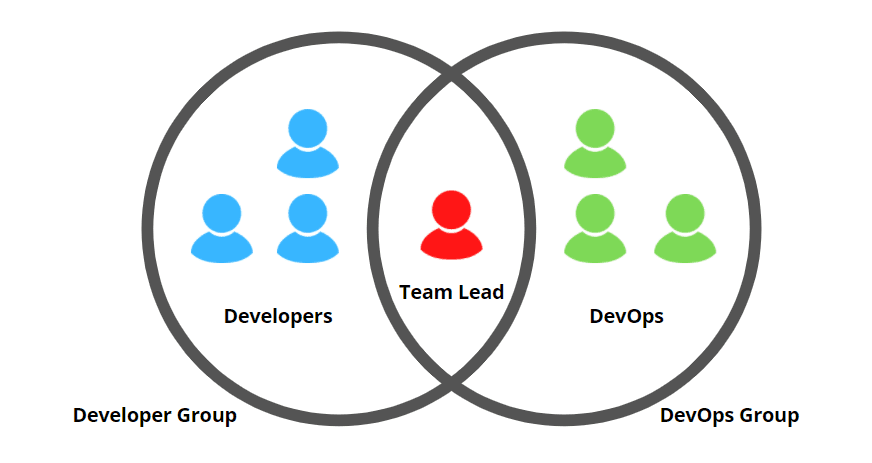
Let’s assume that your team consists of 3 developers and 3 DevOps engineers. You can create 2 separate groups for them and assign their accounts to them.
However, if your team lead needs access to both services used by developers and DevOps, you don't need to create 2 accounts for him or give root access. You can simply assign his account to both user groups.
Users will inherit all the policies from assigned groups.
When you assign a user to a single group or multiple groups, that user will automatically inherit all the policies from those groups.
So, you need to be very careful when assigning users to groups.
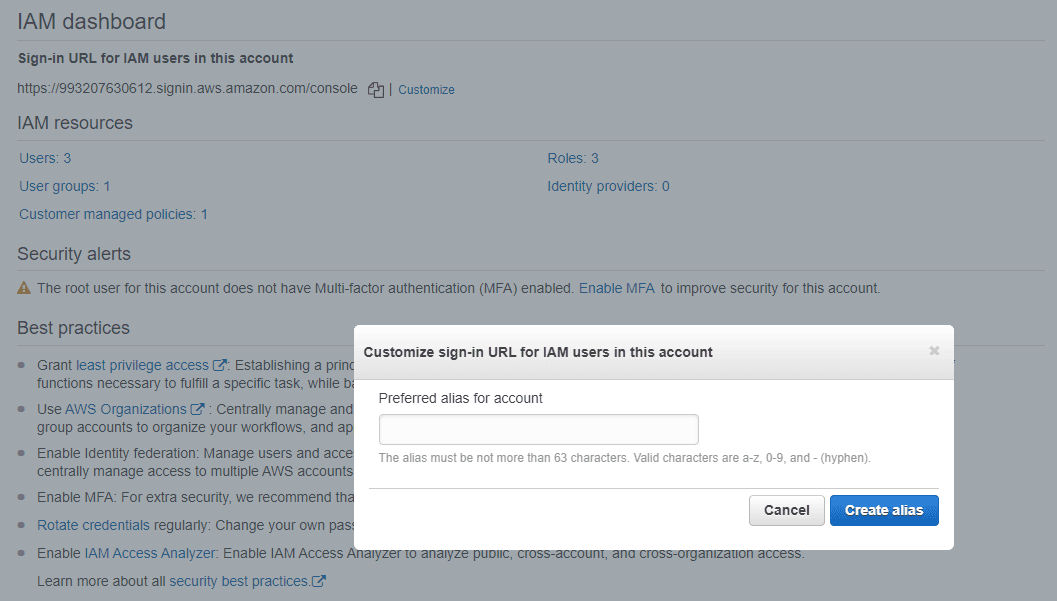
You can customize IAM log-in URL
In the final step of user creation, you received s unique URL to log in to your IAM account.
https://993217630612.signin.aws.amazon.com/console
you can customize this URL to make it more user-friendly using the IAM dashboard.
Use Access Advisor to
In addition to all these, AWS allows you to create password policies and add multi-factor authentication for your account as well. So, let’s see how to configure it.
Multi-Factor Authentication
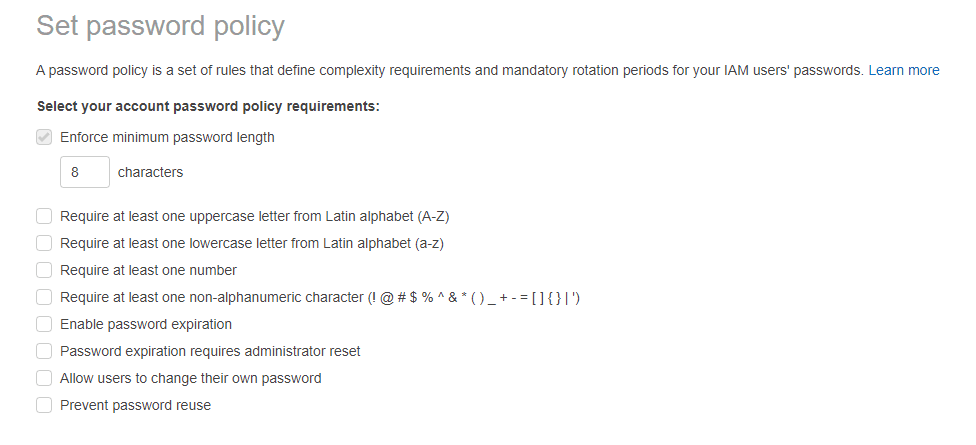
Creating a password policy is pretty easy. You can find the change password policy option under Account settings in the IAM dashboard. It all allows you multiple options to select like length, special character, expiry time, etc.
Sometimes, the password might not be enough to protect your account, and that’s why AWS allows you to use multi-factor authentication.
AWS allows you to use multiple types of multi-factor authentication options:
- Virtual MFA devices: This is the most popular option among developers, and you can use mobile applications like Google authenticator, Authy, and Virtual MFA devices.
- U2F security keys: This is an external device that can be plugged into your laptop to authenticate.
- Hardware Key Fob MFA Devices
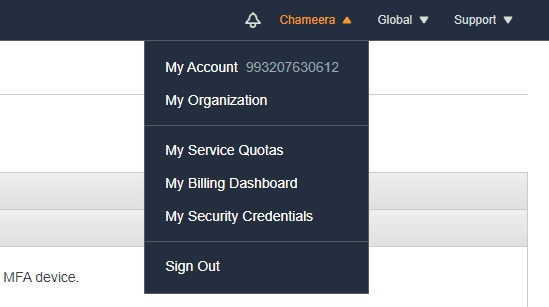
You can enable MFA by navigating to the Security credentials section, and there you will see an option to Activate MFA.
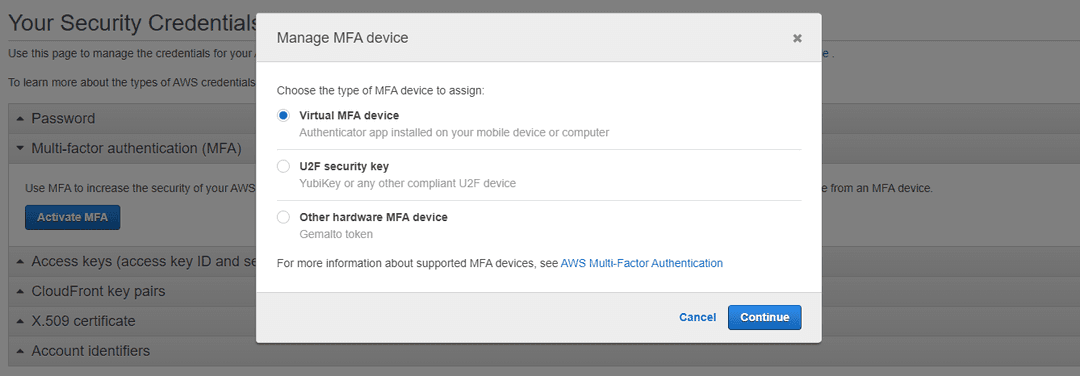
For this example, I will be using the Authy application. So I have chosen the Virtual MFA device option.
Then you will be shown a modal with a QR code, and you need to scan it with your application and enter the 2 MFA codes you receive to compete with the wizard.
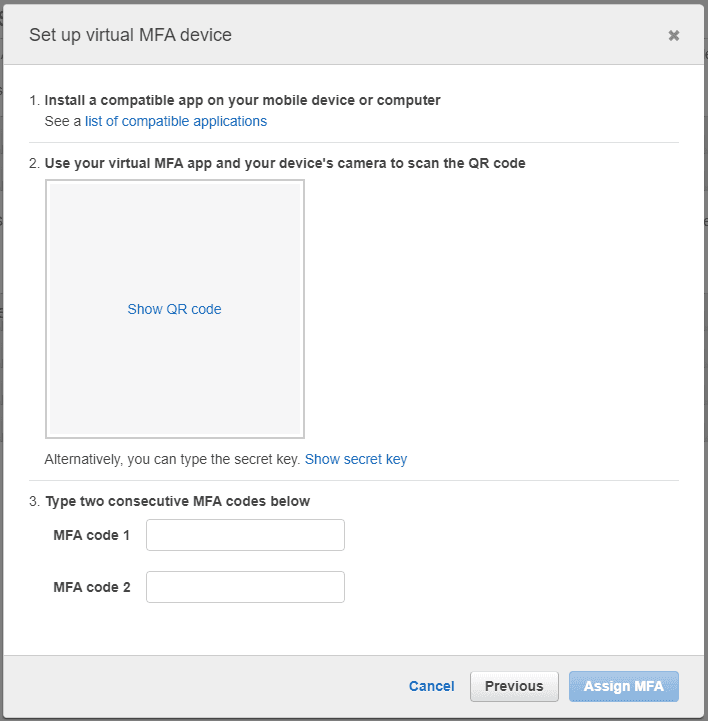
That’s it. Now you have successfully enabled MFA for your AWS account.
So, in this article, I have discussed some essential aspects of AWS IAM, and I hope that they will help you secure your account.
Thank you for Reading !!!
Learn More
- Asynchronous Request Handling with AWS SQS by Chameera Dulanga
Asynchronous Request Handling with AWS SQS
How AWS SQS Makes Request Handling Easyenlear.academy
- AWS CDK — A Beginner’s Guide with Examples by Manoj Fernando
- Web Hosting with AWS by Sahan Amarsha
Web Hosting with AWS
Hands on tutorial with AWS hosting services. enlear.academy