If you’ve ever launched an EC2 instance and wondered “Why can’t I connect to it?”, chances are the answer lives inside AWS Security Groups.
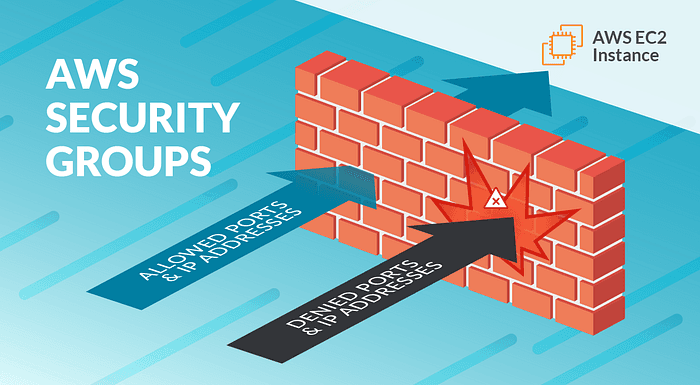
Security Groups are one of the most important but least understood parts of AWS networking. They are like the first line of defense for your cloud resources, deciding who can talk to what and on which ports.
Let’s break it down in simple understandable terms.
What Is a Security Group use for?
A Security Group in AWS is a virtual firewall that controls inbound(coming) and outbound(going) traffic for resources like:
- EC2 instances
- Load balancers
- RDS databases
- Lambda functions (in a VPC)
Instead of protecting a whole network, a security group is attached directly to a resource.
Imagine that there is a bouncer at the door of your server:
- If your traffic is on the guest list → you’re allowed in
- If not → you’re blocked
How Security Groups Work
Security Groups work using rules.
Each rule defines:
- Protocol (TCP, UDP, ICMP)
- Port number (e.g., 22 for SSH, 80 for HTTP)
- Source or destination (IP range or another security group)
There are two kinds of rules:
1. Inbound Rules
These control incoming traffic , These control the traffic that leaves your resource.
Example:
- Allow SSH (port 22) from your office IP
- Allow HTTP (port 80) from the internet
2. Outbound Rules
These control outgoing traffic from your resource.
By default:
- All outbound traffic is allowed
Keep in mind : Security Groups Are Stateful
Security Groups are stateful, that means:
- If you allow incoming traffic, the response is automatically allowed out
- You do not need to create a outbound rules for response
This makes them easier to use(and safer) than regular firewalls.
What Security Groups Can’t Do
Security Groups:
- Cannot block traffic explicitly (No “Deny” Rules)
- Don’t work at the subnet level
- Don’t look at the contents of the packet
If traffic isn’t explicitly allowed, it’s blocked by default.
Best Practices for Using Security Groups
Here are a few useful tips:
1. Follow the Principle of Least Privilege
Only open the ports you actually need.
Bad:
0.0.0.0/0 → All ports
Better:
Your IP → Port 22
Internet → Port 80
2. Use Security Groups as Sources
Instead of using IP addresses, use other security groups as a reference.
Example:
- Allow database access only from your application servers
- Not from the entire internet
This makes your setup:
- More Safer
- Easier to handle
- Less error-prone
3. Split up by role
Create different security groups for:
- Web servers
- Application servers
- Databases
This makes it clear who is responsible for what and lowers the risk.
A Simple Real-World Example
Think of a simple web app:
- Web Server — Inbound: HTTP (80) from the internet
- App Server — Inbound: Custom port from Web Server SG
- Database — Inbound: Port 3306 from App Server SG
Each layer talks only to the one it needs.
No unnecessary exposure. No guessing.
Final Thoughts
Security Groups may seem simple, but they are very important for keeping your AWS infrastructure safe.
If you understand:
- What traffic is allowed
- Where it’s coming from
- Why it’s needed
You’re already ahead of many cloud beginners.
Start small, be strict, and open only what you truly need.
That’s how you stay secure in AWS.